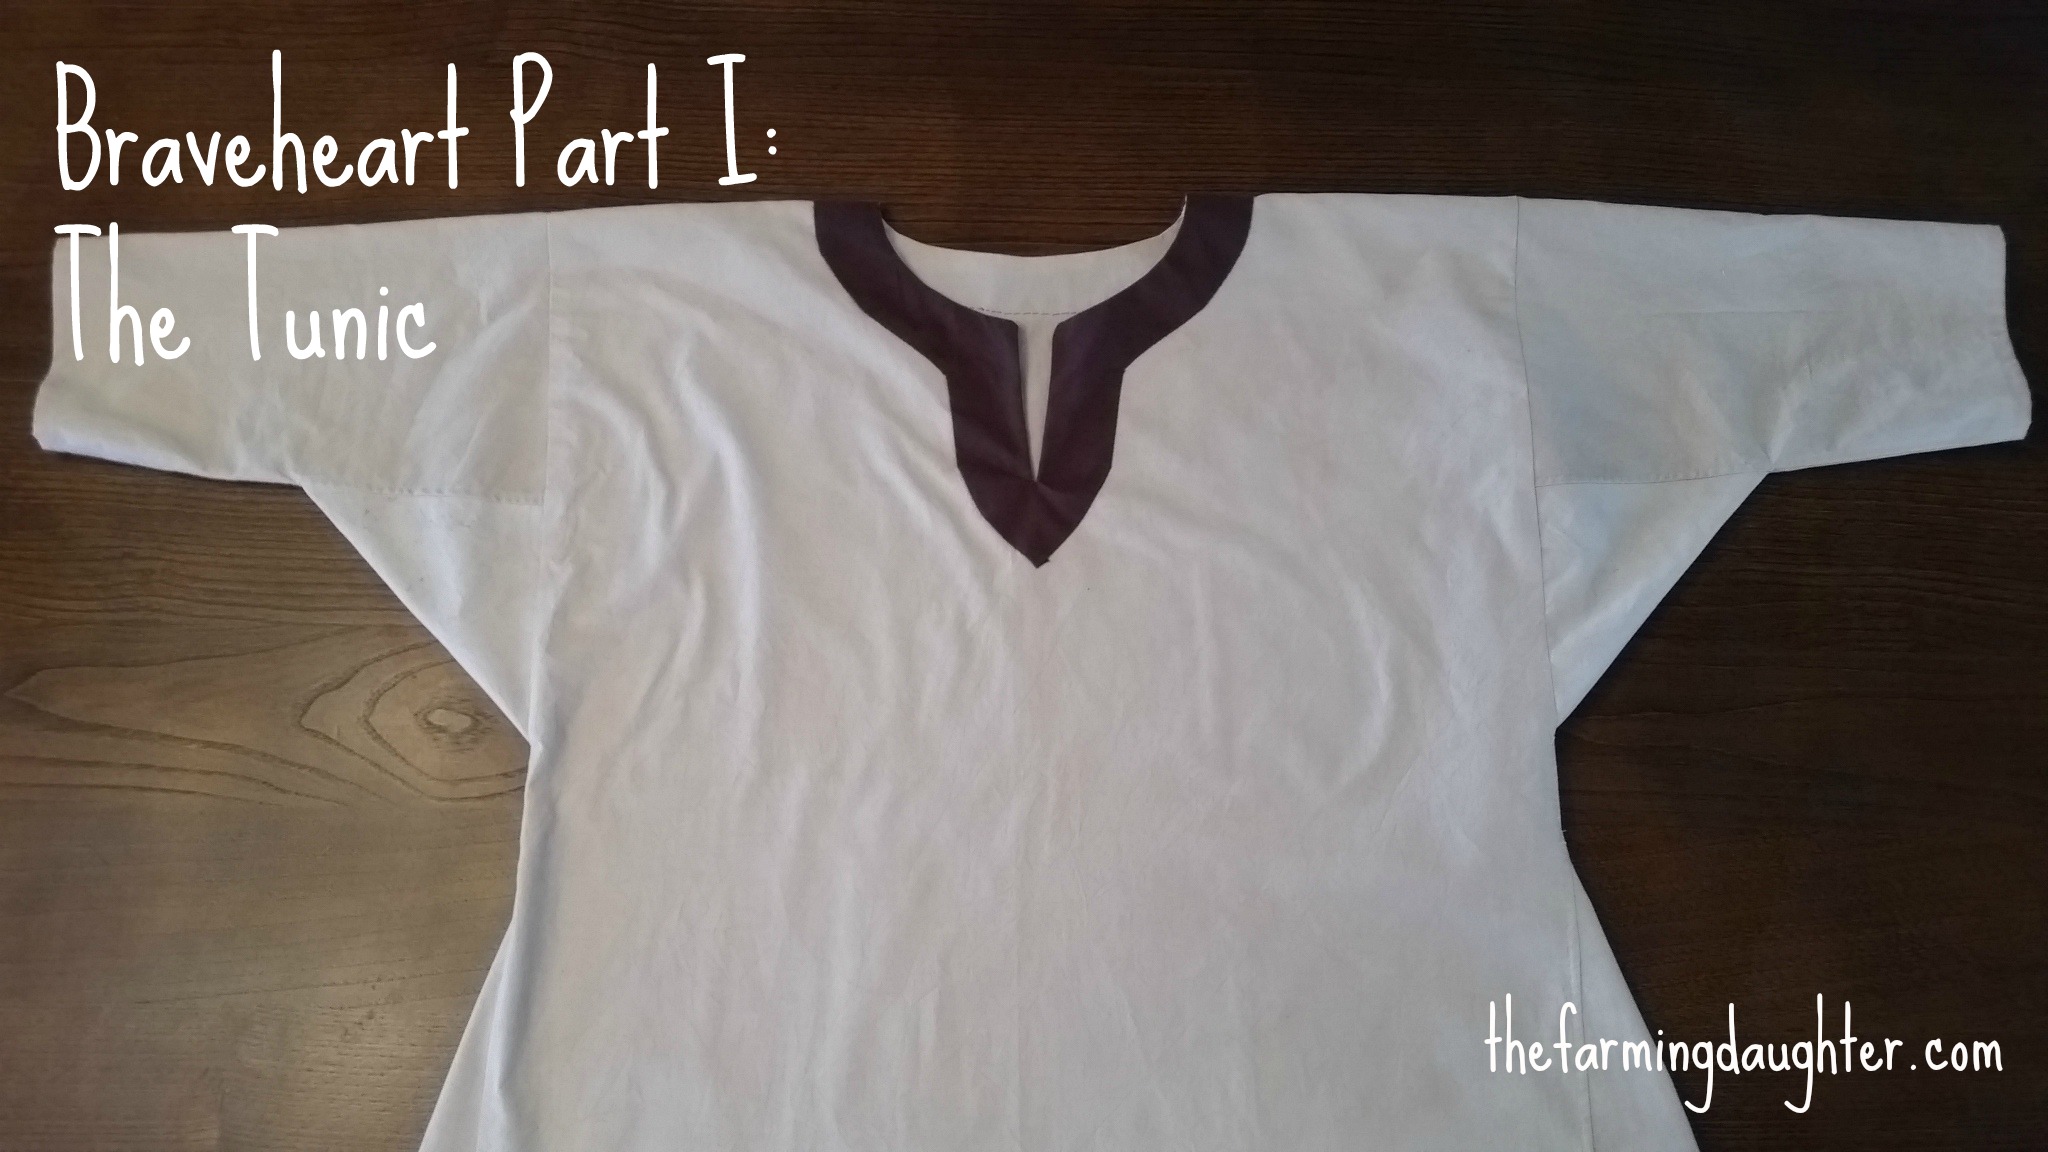
Recently, I finished sewing a neat project for my friend Stewart. Stewart has Scottish ancestors and is a fan of Braveheart, so he asked me to make a kilt and tunic similar to the one William Wallace wears in the movie. It was fun sewing a “costume” that didn’t have to be 100% authentic for a change. This post will be focus on the tunic, and part two will show the kilt construction and completed outfit.
I had just enough cotton material left over from constructing the kilt that I thought I could squeeze out a tunic. It was difficult to find any clear pictures from the movie of just the tunic, so I decided to base it off of the Bocksten Tunic. This style of tunic is accurate for the 13th-14th centuries (when William Wallace was alive), and is cut to use fabric economically (which was good since I didn’t have much material).
The cotton fabric I had was white, so I used tea bags to dye it a more “natural” color. I boiled a big pot of water, and steeped about thirty of the cheapest tea bags I could find. Then I submerged the fabric in the dye and let it soak until I thought the color was dark enough. To prevent the color from being mottled I made sure to frequently stir and turn the fabric so all of the material who absorb the dye evenly. Finally, I wrung the extra tea out and dried the fabric in the dryer on high to “set” the dye.
I drafted my own pattern, using this tutorial as a guideline. I took measurements off a T-shirt to give me a general idea on sizing. The tunic is a very simple style, with two big rectangles as the front and back.

Since I didn’t have much material I had to piece three rectangles together for the back.

The sleeves are elbow length and are made of tapered rectangles with square gussets.

A triangular gore is added to each side of the tunic to add width. The gore also had to be pieced due to my small amount of fabric.

I drafted the keyhole neckline facing following the instructions from this tutorial.
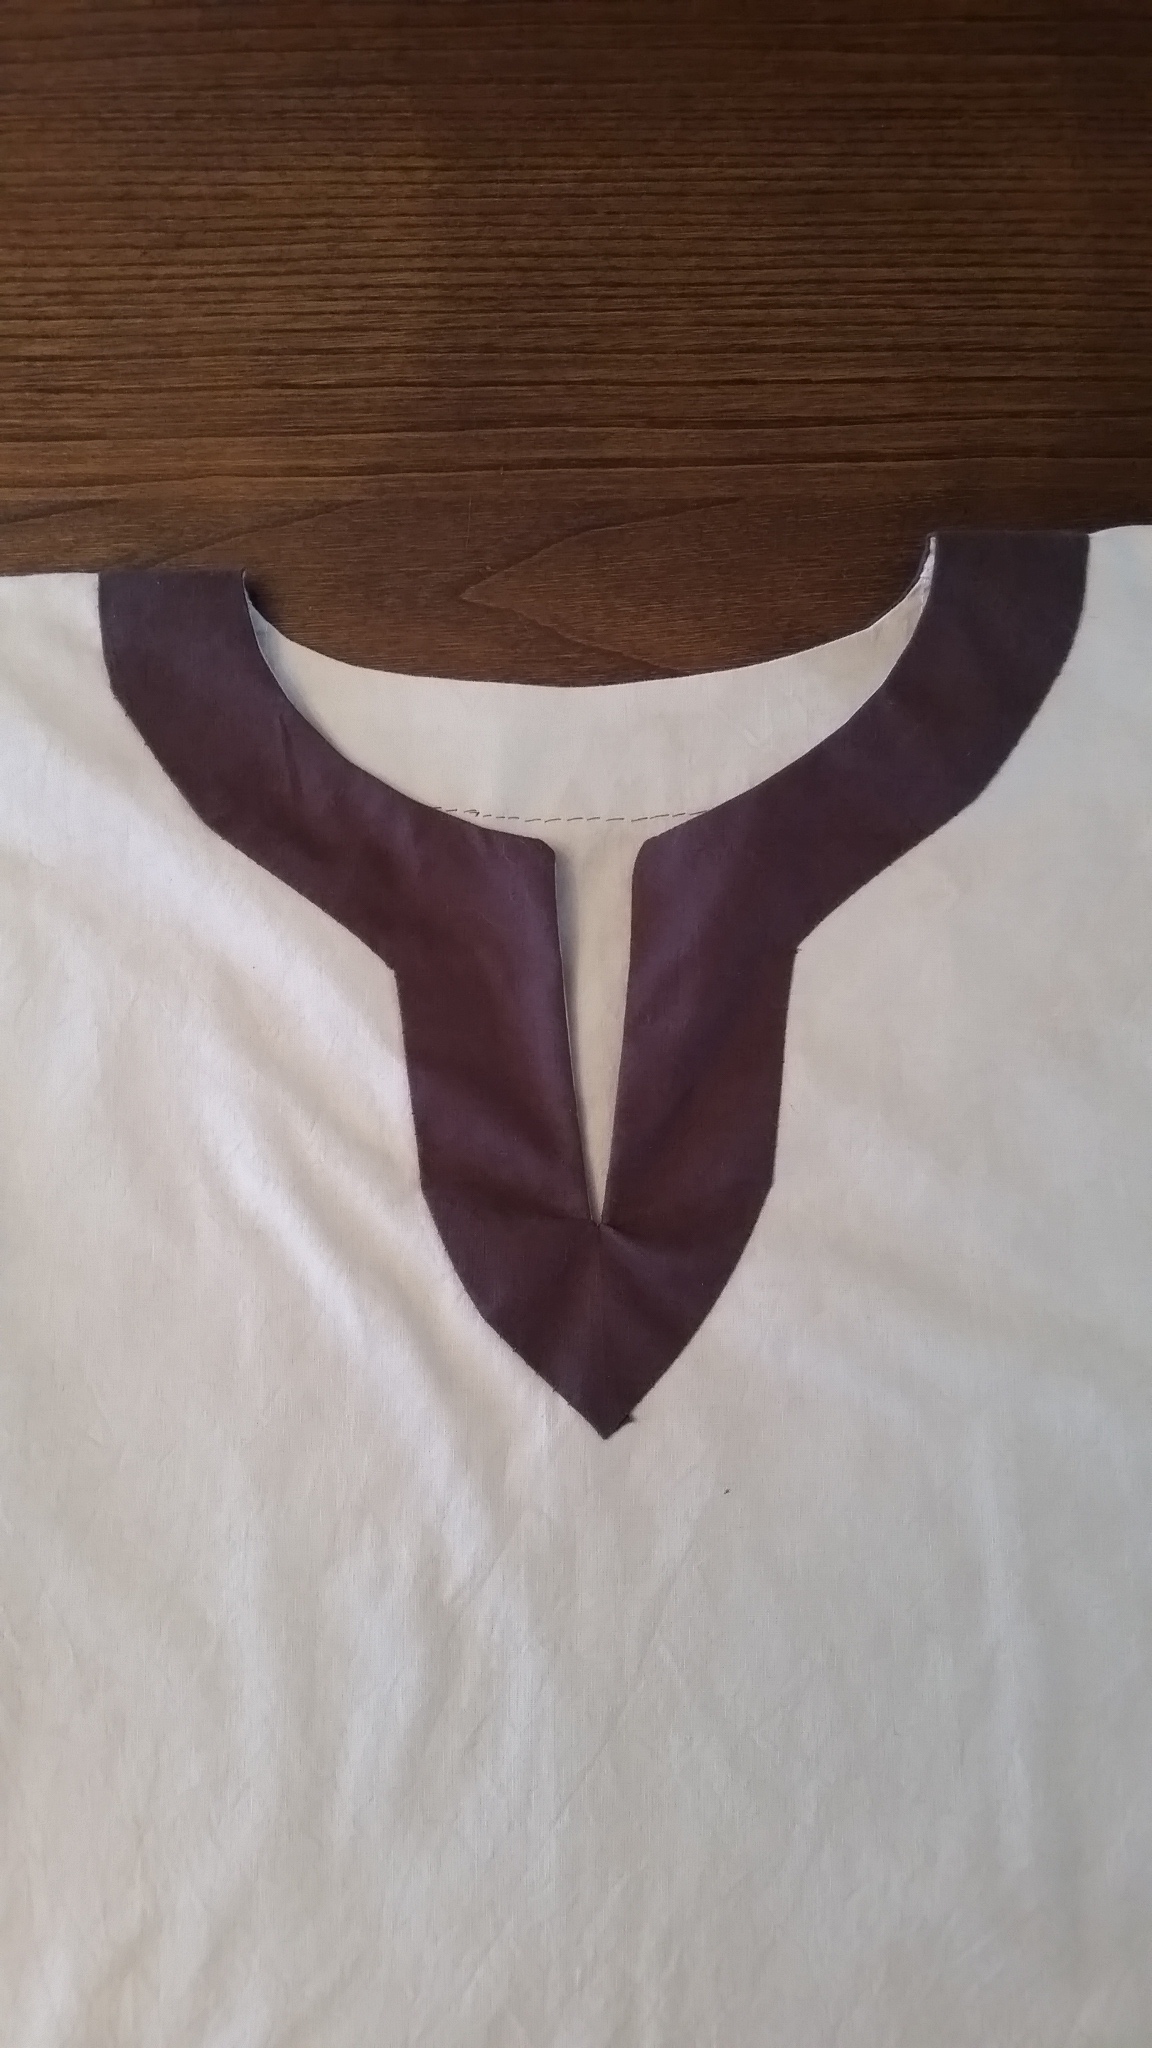
Since authenticity wasn’t a big issue, I used the sewing machine for all of the seams except for the slip stitch on the neckline. The bottom of the tunic and sleeve edges have a narrow turned hem. All of the seams, except where the sleeves are set in, are flat felled for durability.
The basic stats:
Fabric: White Kona cotton dyed using tea
Pattern: Drafted my own pattern using this tutorial as a guideline, and this tutorial for the neckline
Notions: Thread, tea bags to dye the fabric
How historically accurate is it?: The tunic is patterned after the Bocksten Tunic, and has a shape and design appropriate for the 13th-14th centuries (when William Wallace was alive). I used the machine to sew it though, which is not accurate in the least 🙂
Hours to complete: 6 maybe??? (not including the fabric dyeing)
Stay tuned for Part II: The Kilt! (And don’t worry, I haven’t forgotten the cow care post. I just want to get some pictures to illustrate what I’m talking about and then I’ll post, hopefully by the end of this weekend.)
-The Farming Daughter

I hope you didn’t use Golden Monkey to dye the shirt! Aunt Carole
Actually I used tea so cheap you probably wouldn’t even call it “tea”! 🙂
-The Farming Daughter
[…] (If you didn’t see yesterday’s post you can read it here.) […]