18th Century Pockets

D2s2v1505250627

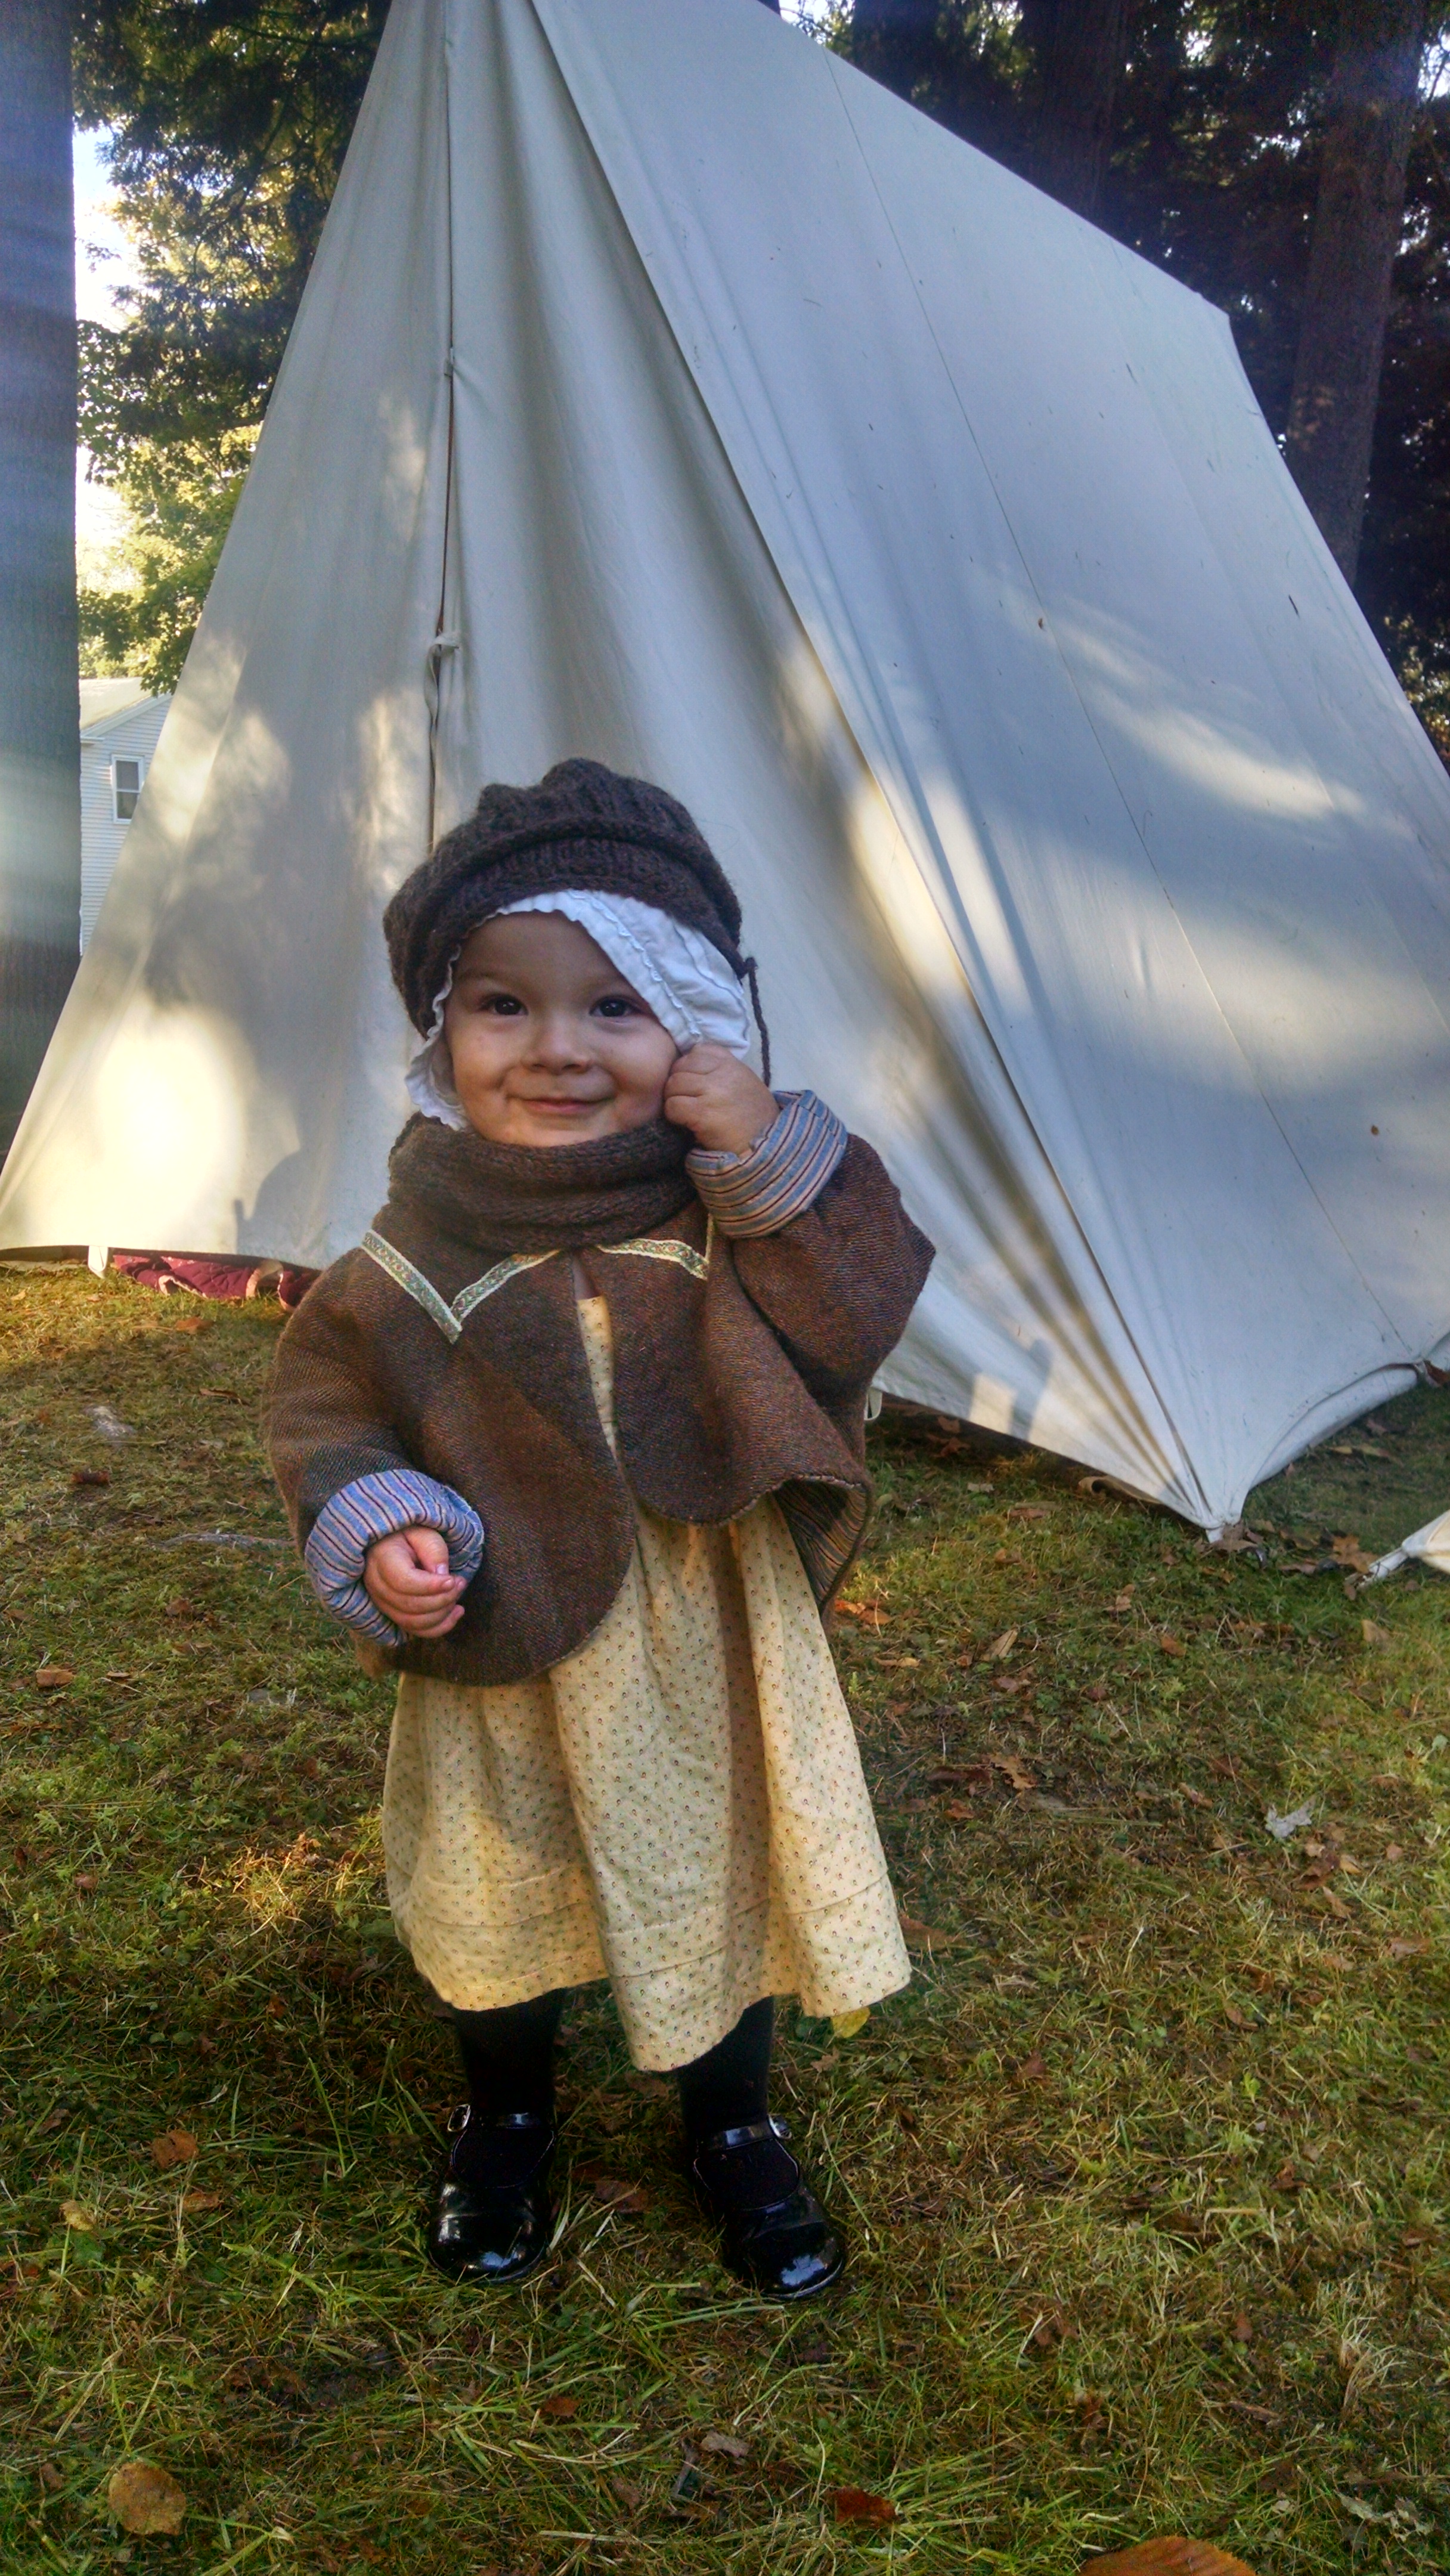
My first item of clothing for my Rev War camp follower kit is completed… a pair of pockets!

Most women, myself included, lament the utter uselessness or total lack of pockets in our garments. Too bad we don’t still use 18th century style pockets! Unlike their modern counterparts, 18th century women’s pockets are roomy and actually functional! Instead of being attached to the garment they are instead suspended on their own waistband/ties. This allows you to change gowns without having to transfer all of your pocket contents and also keeps the pocket from weighing down the skirt. Pockets were accessed through slits in the sides of the petticoats. They could either be a single pocket, a matching pair each on their own set of ties, or a matching pair on one set of ties. To reduce bulk and to prevent me from losing one of my pocket’s mates I chose the latter style.

Many pockets of the 18th century were elaborately embroidered, while others were a pieced patchwork design or printed textile.

pockets museum of london.jpg
An elaborately embroidered pair of late 1770s pockets from the Museum of London (Museum number: MOL 35.35.2)

There are less surviving plain style pockets, but the examples I could find were the inspiration for my pockets, including this simple linen stripe pocket from the MET:

Pocket the met
1789 linen pocket from the MET (Accession Number:
C.I.40.159.4)

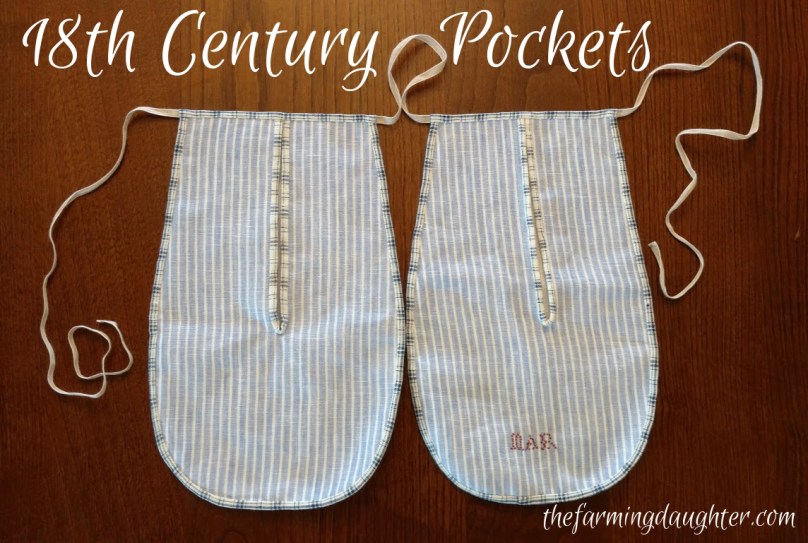
I have to give credit to my dear David. He drafted the pocket pattern piece for me, gave me almost all the fabrics and supplies I needed, and even cross-stitched my initials for me!

IMG_20170908_215639541.jpg
Part of my pocket “kit” from David 🙂

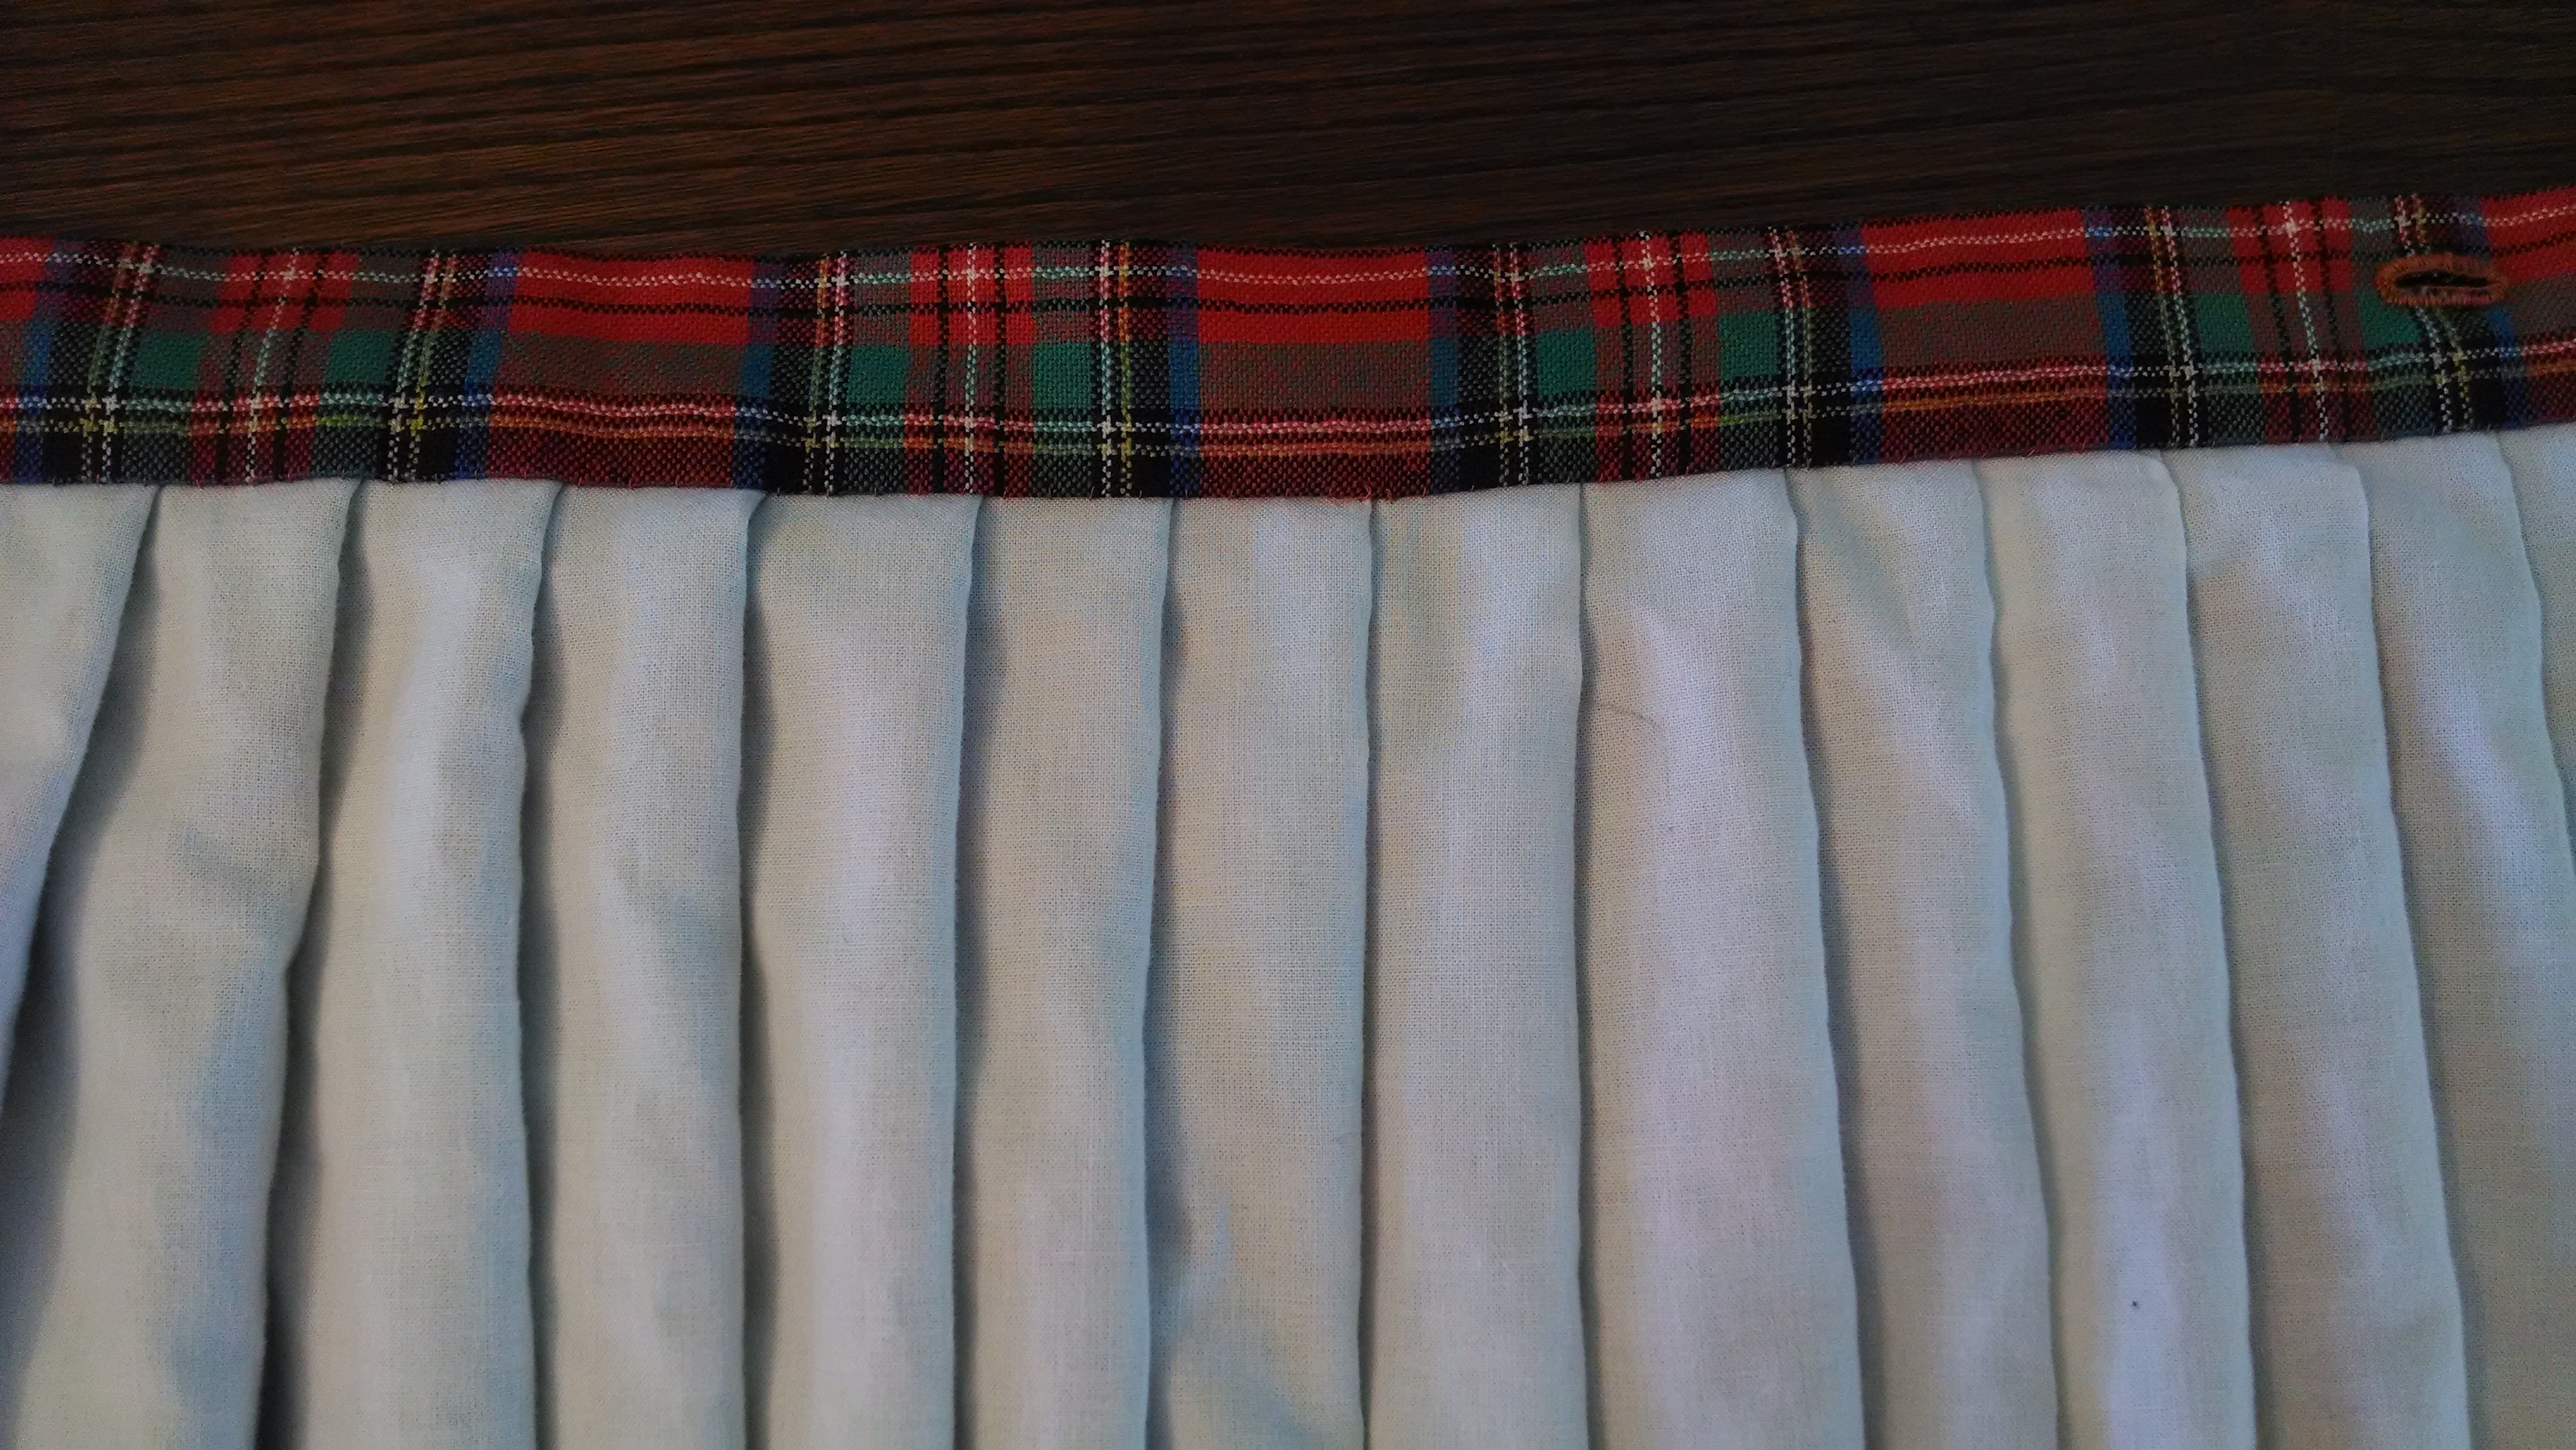
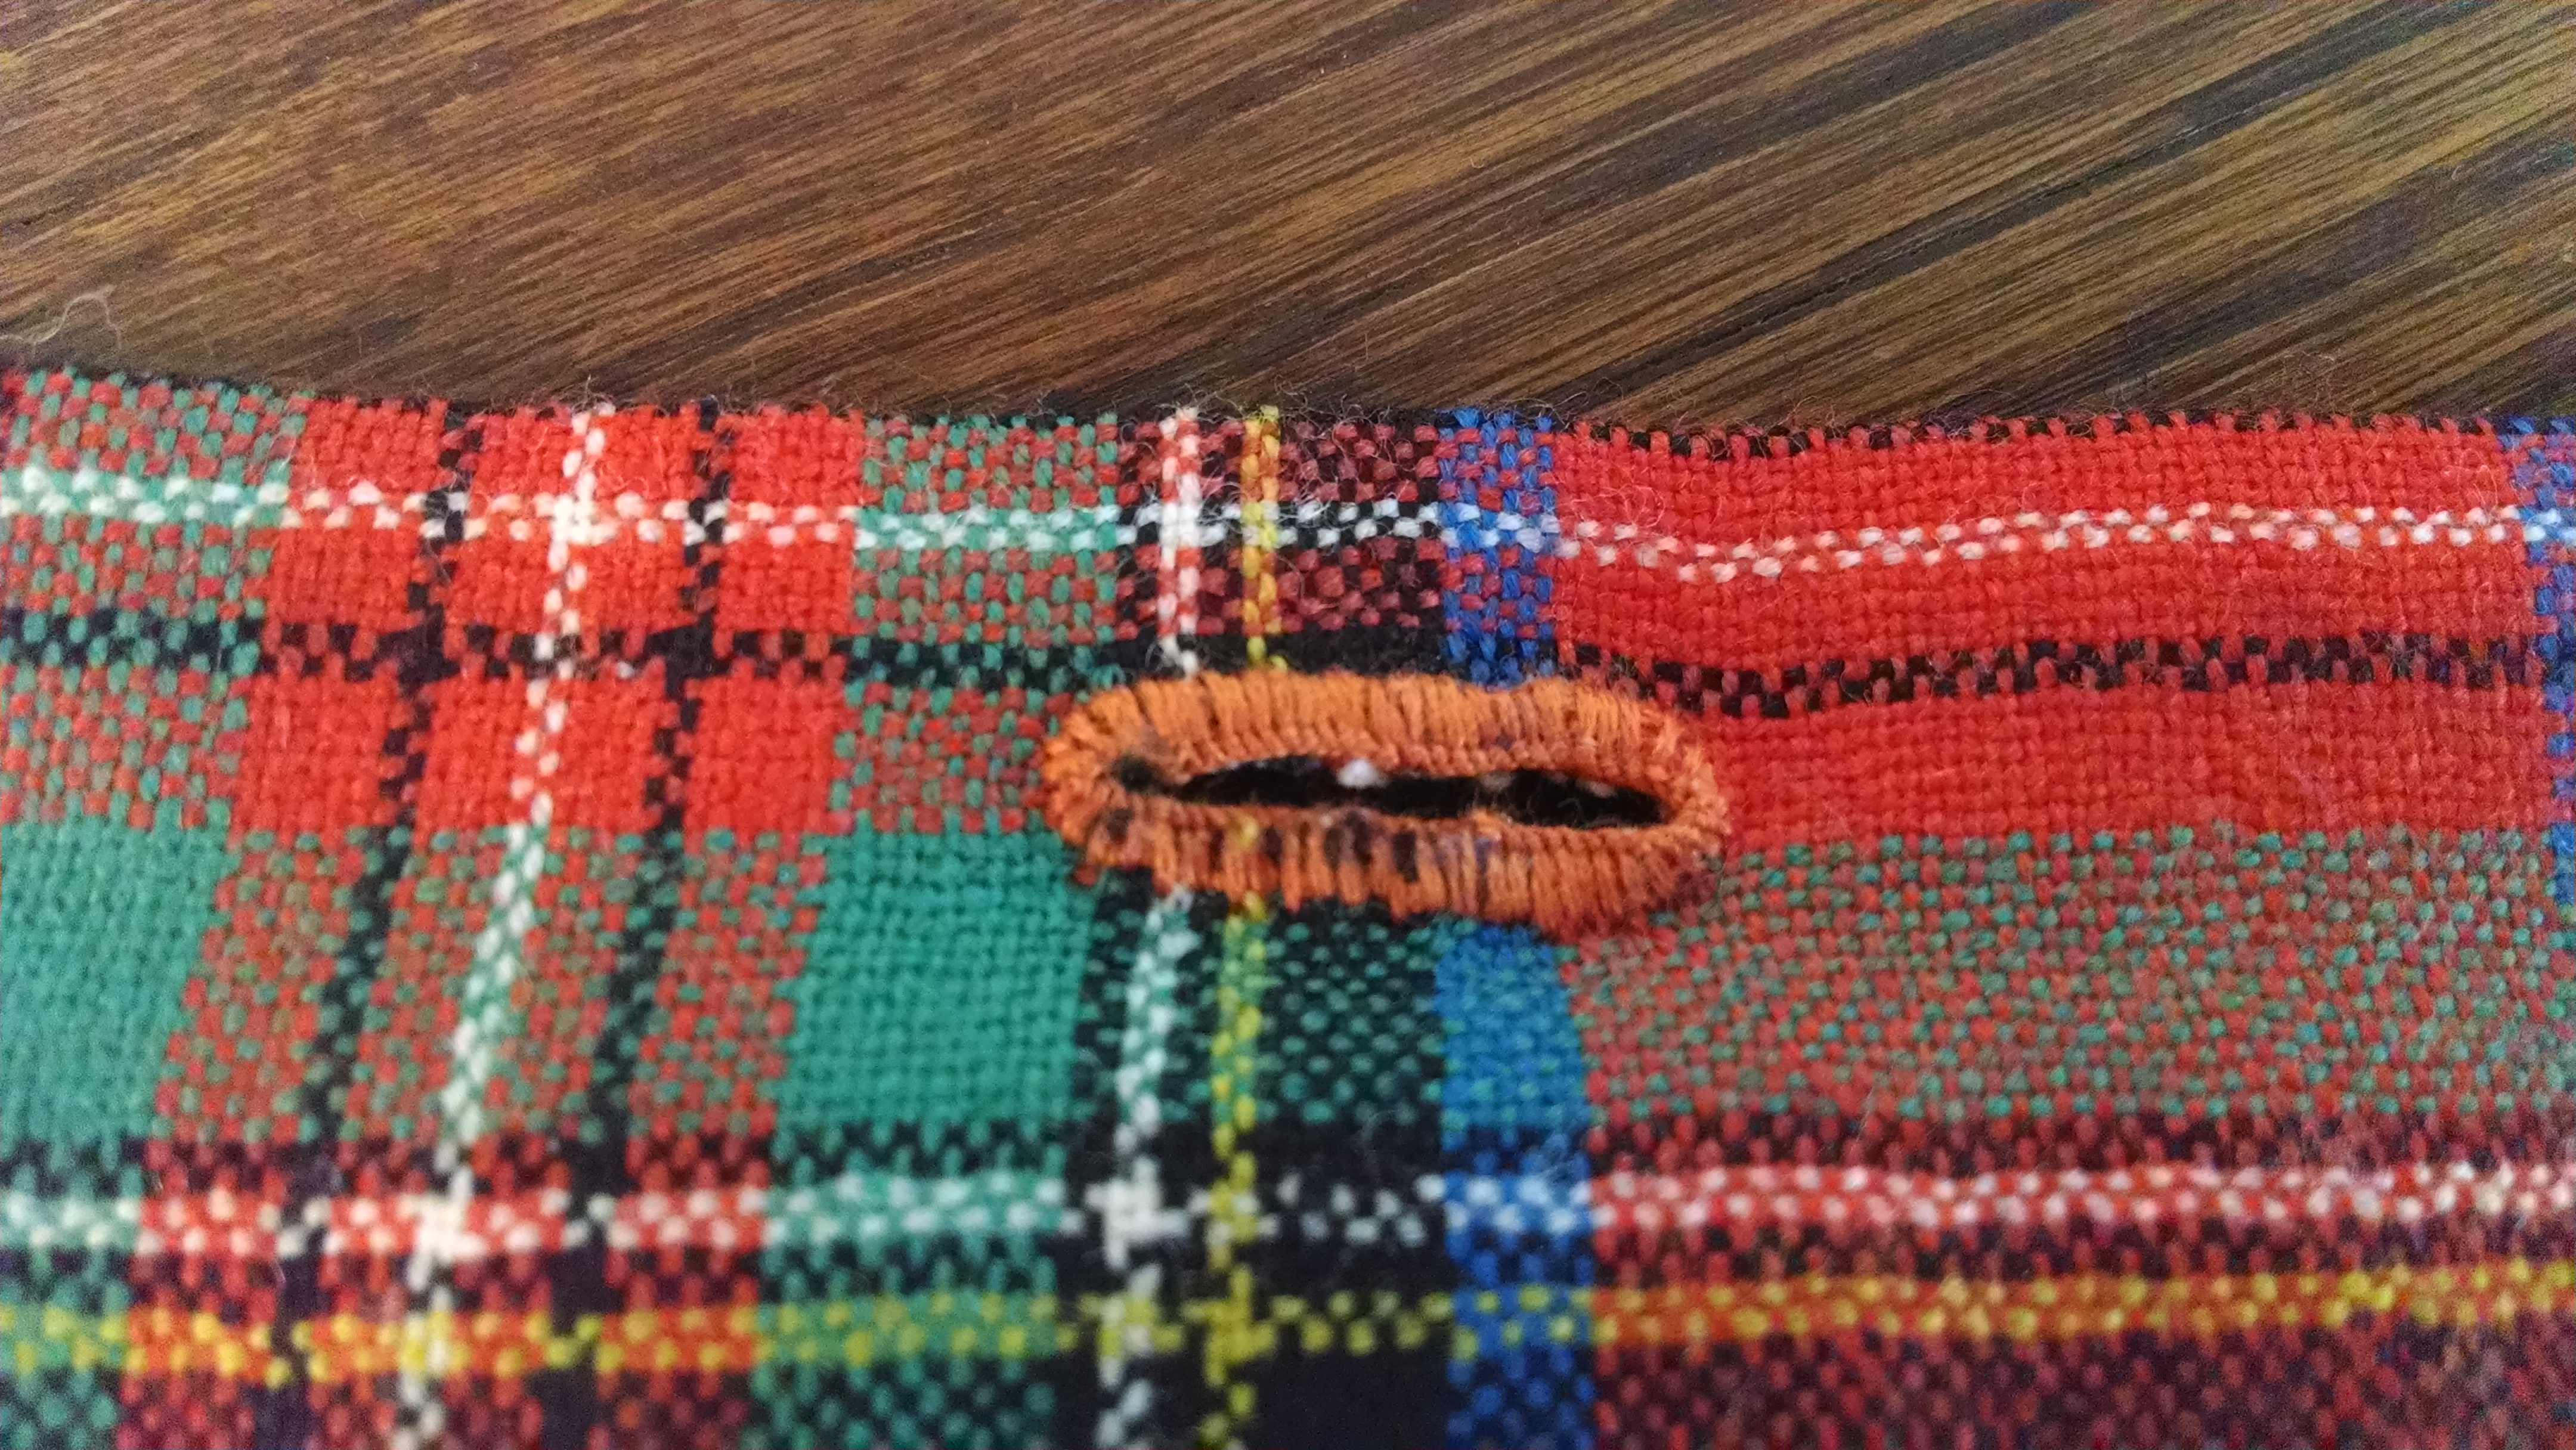
The front of the pockets is a lightweight stripe linen that I flat-lined with a scrap of handkerchief linen I had on hand, just to give it some body. I basted these two layers together before binding the pocket slit with a 1″ strip of blue plaid linen. The binding is back-stitched with a scant 1/4″ seam and then folded over to the wrong side and whip-stitched down to encase all of the raw edges.

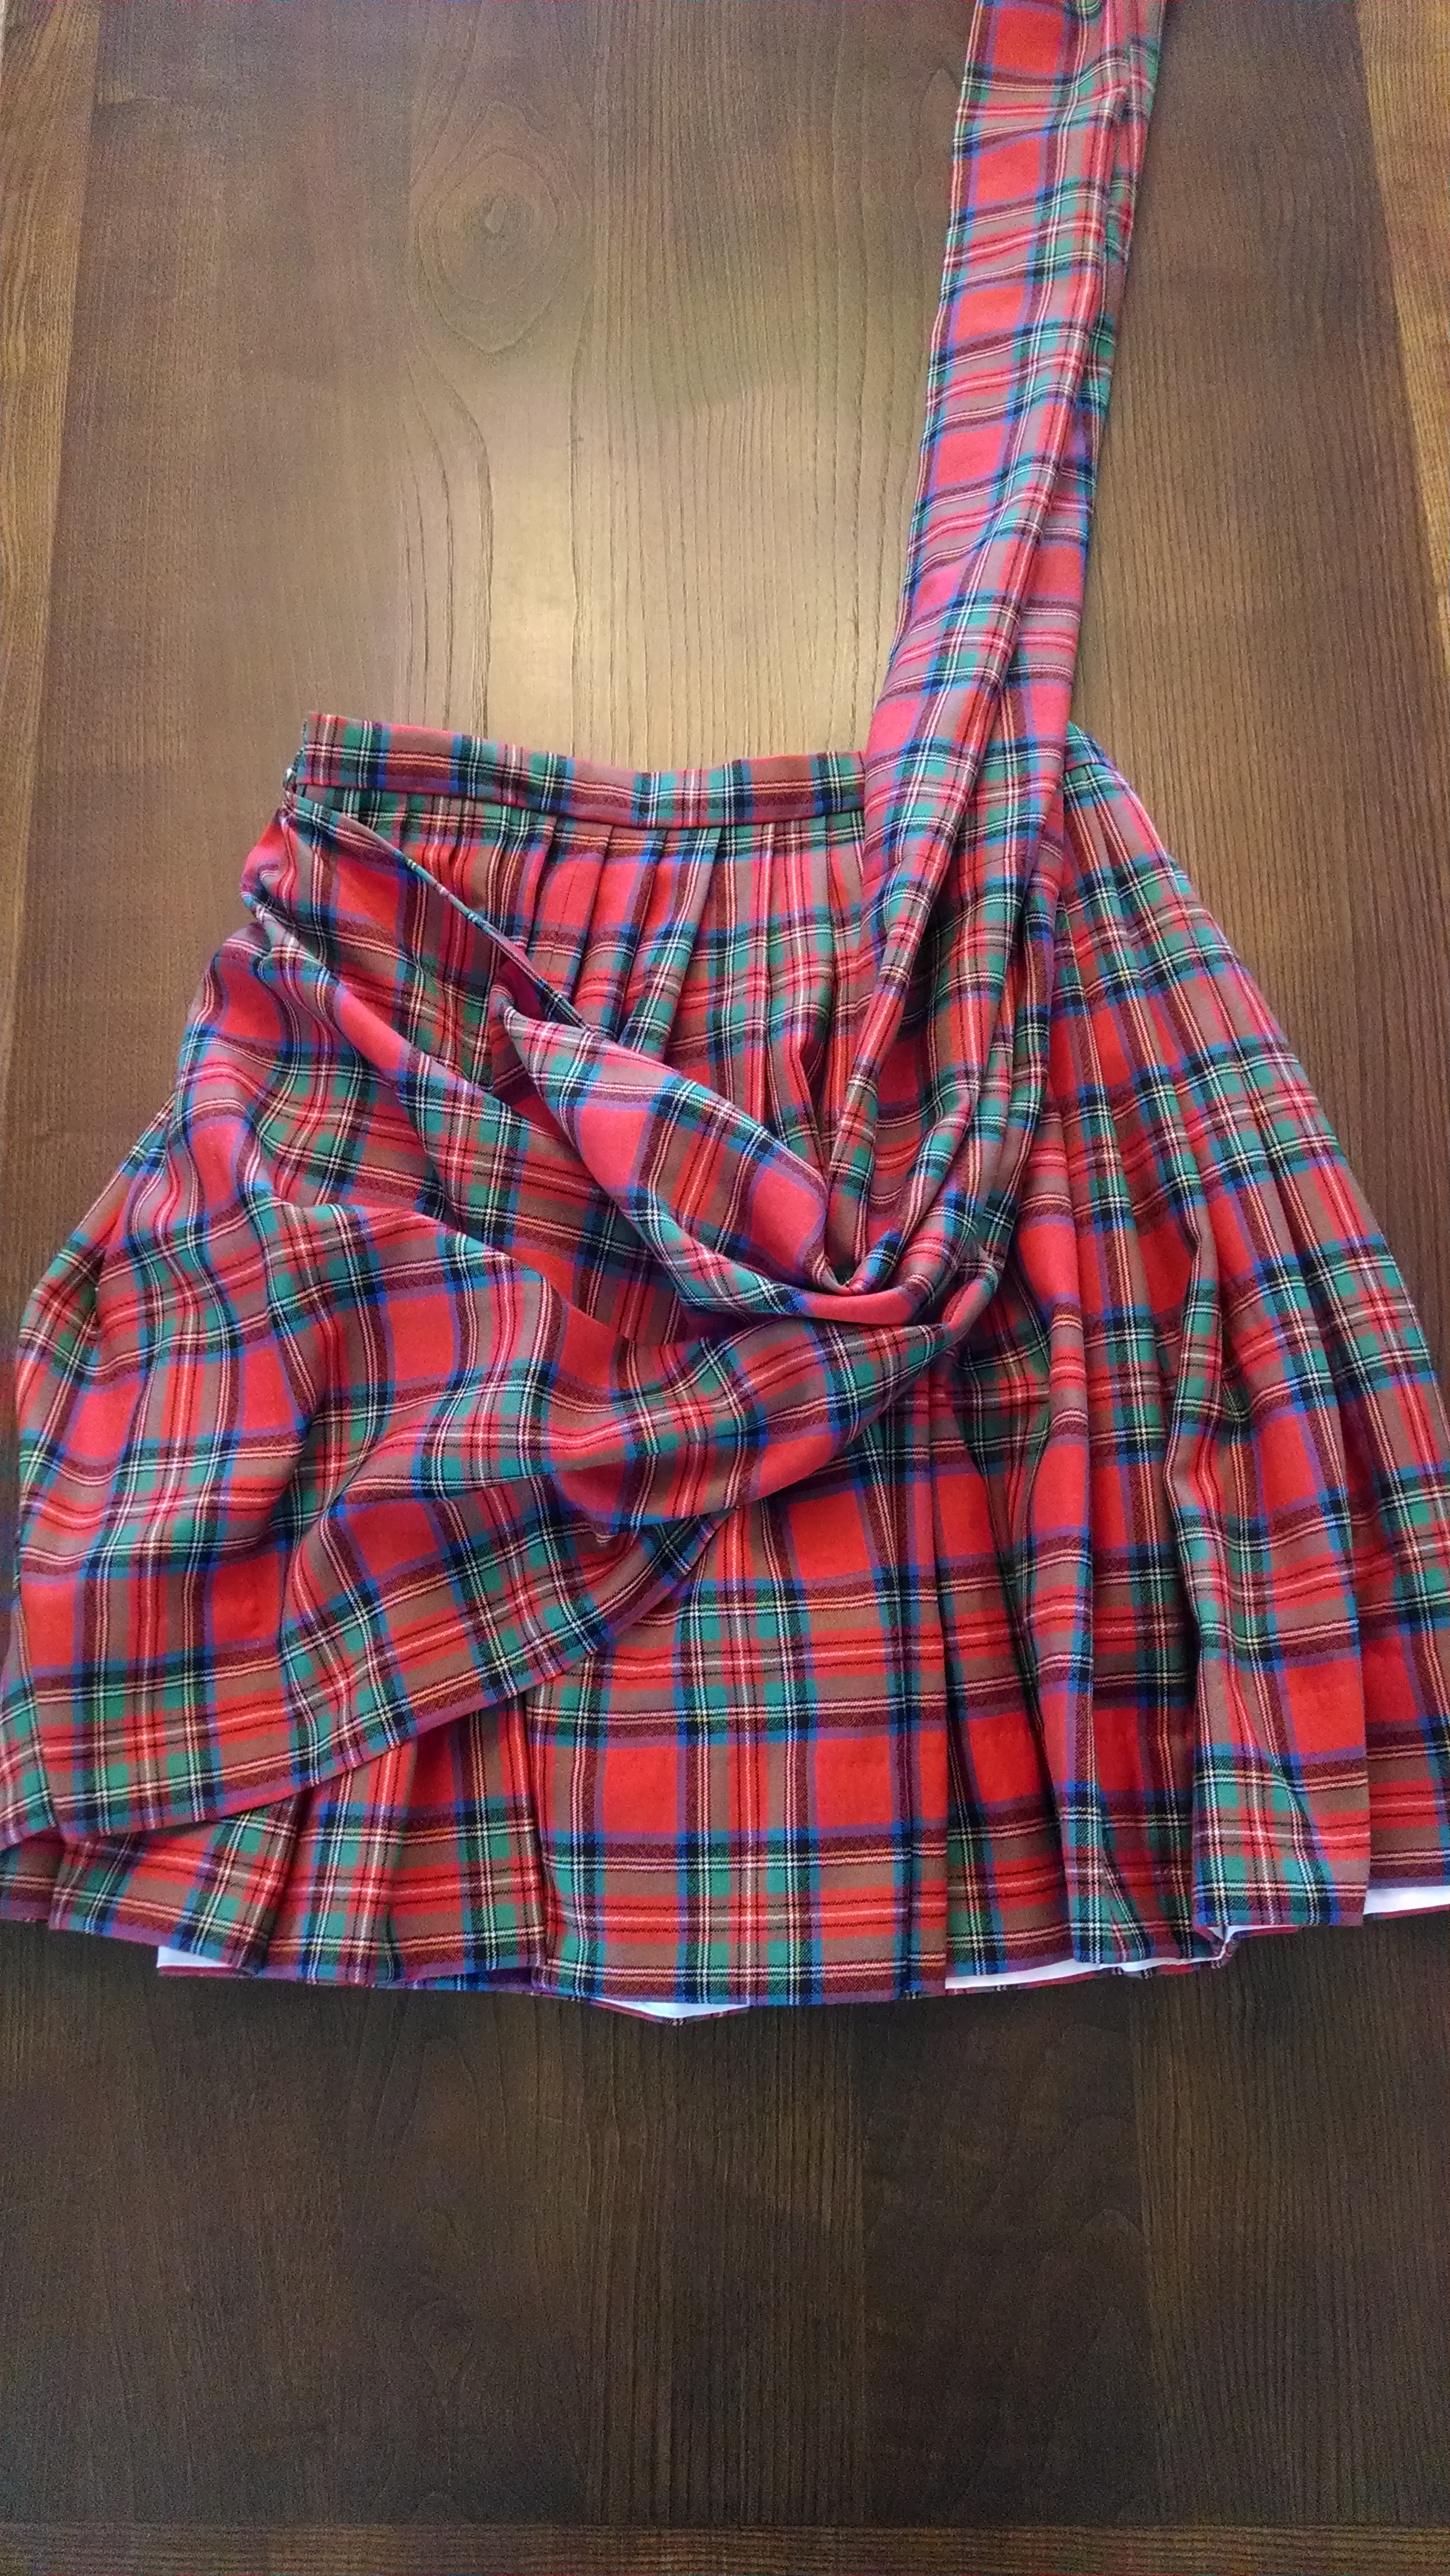
Most examples I saw had a plain linen back, so I used a medium weight white linen I had on hand. I basted the front and backs of the pockets together and then bound the edges with more of the plaid linen.

IMG_20170912_142518570 (1).jpg
The backside of my pocket

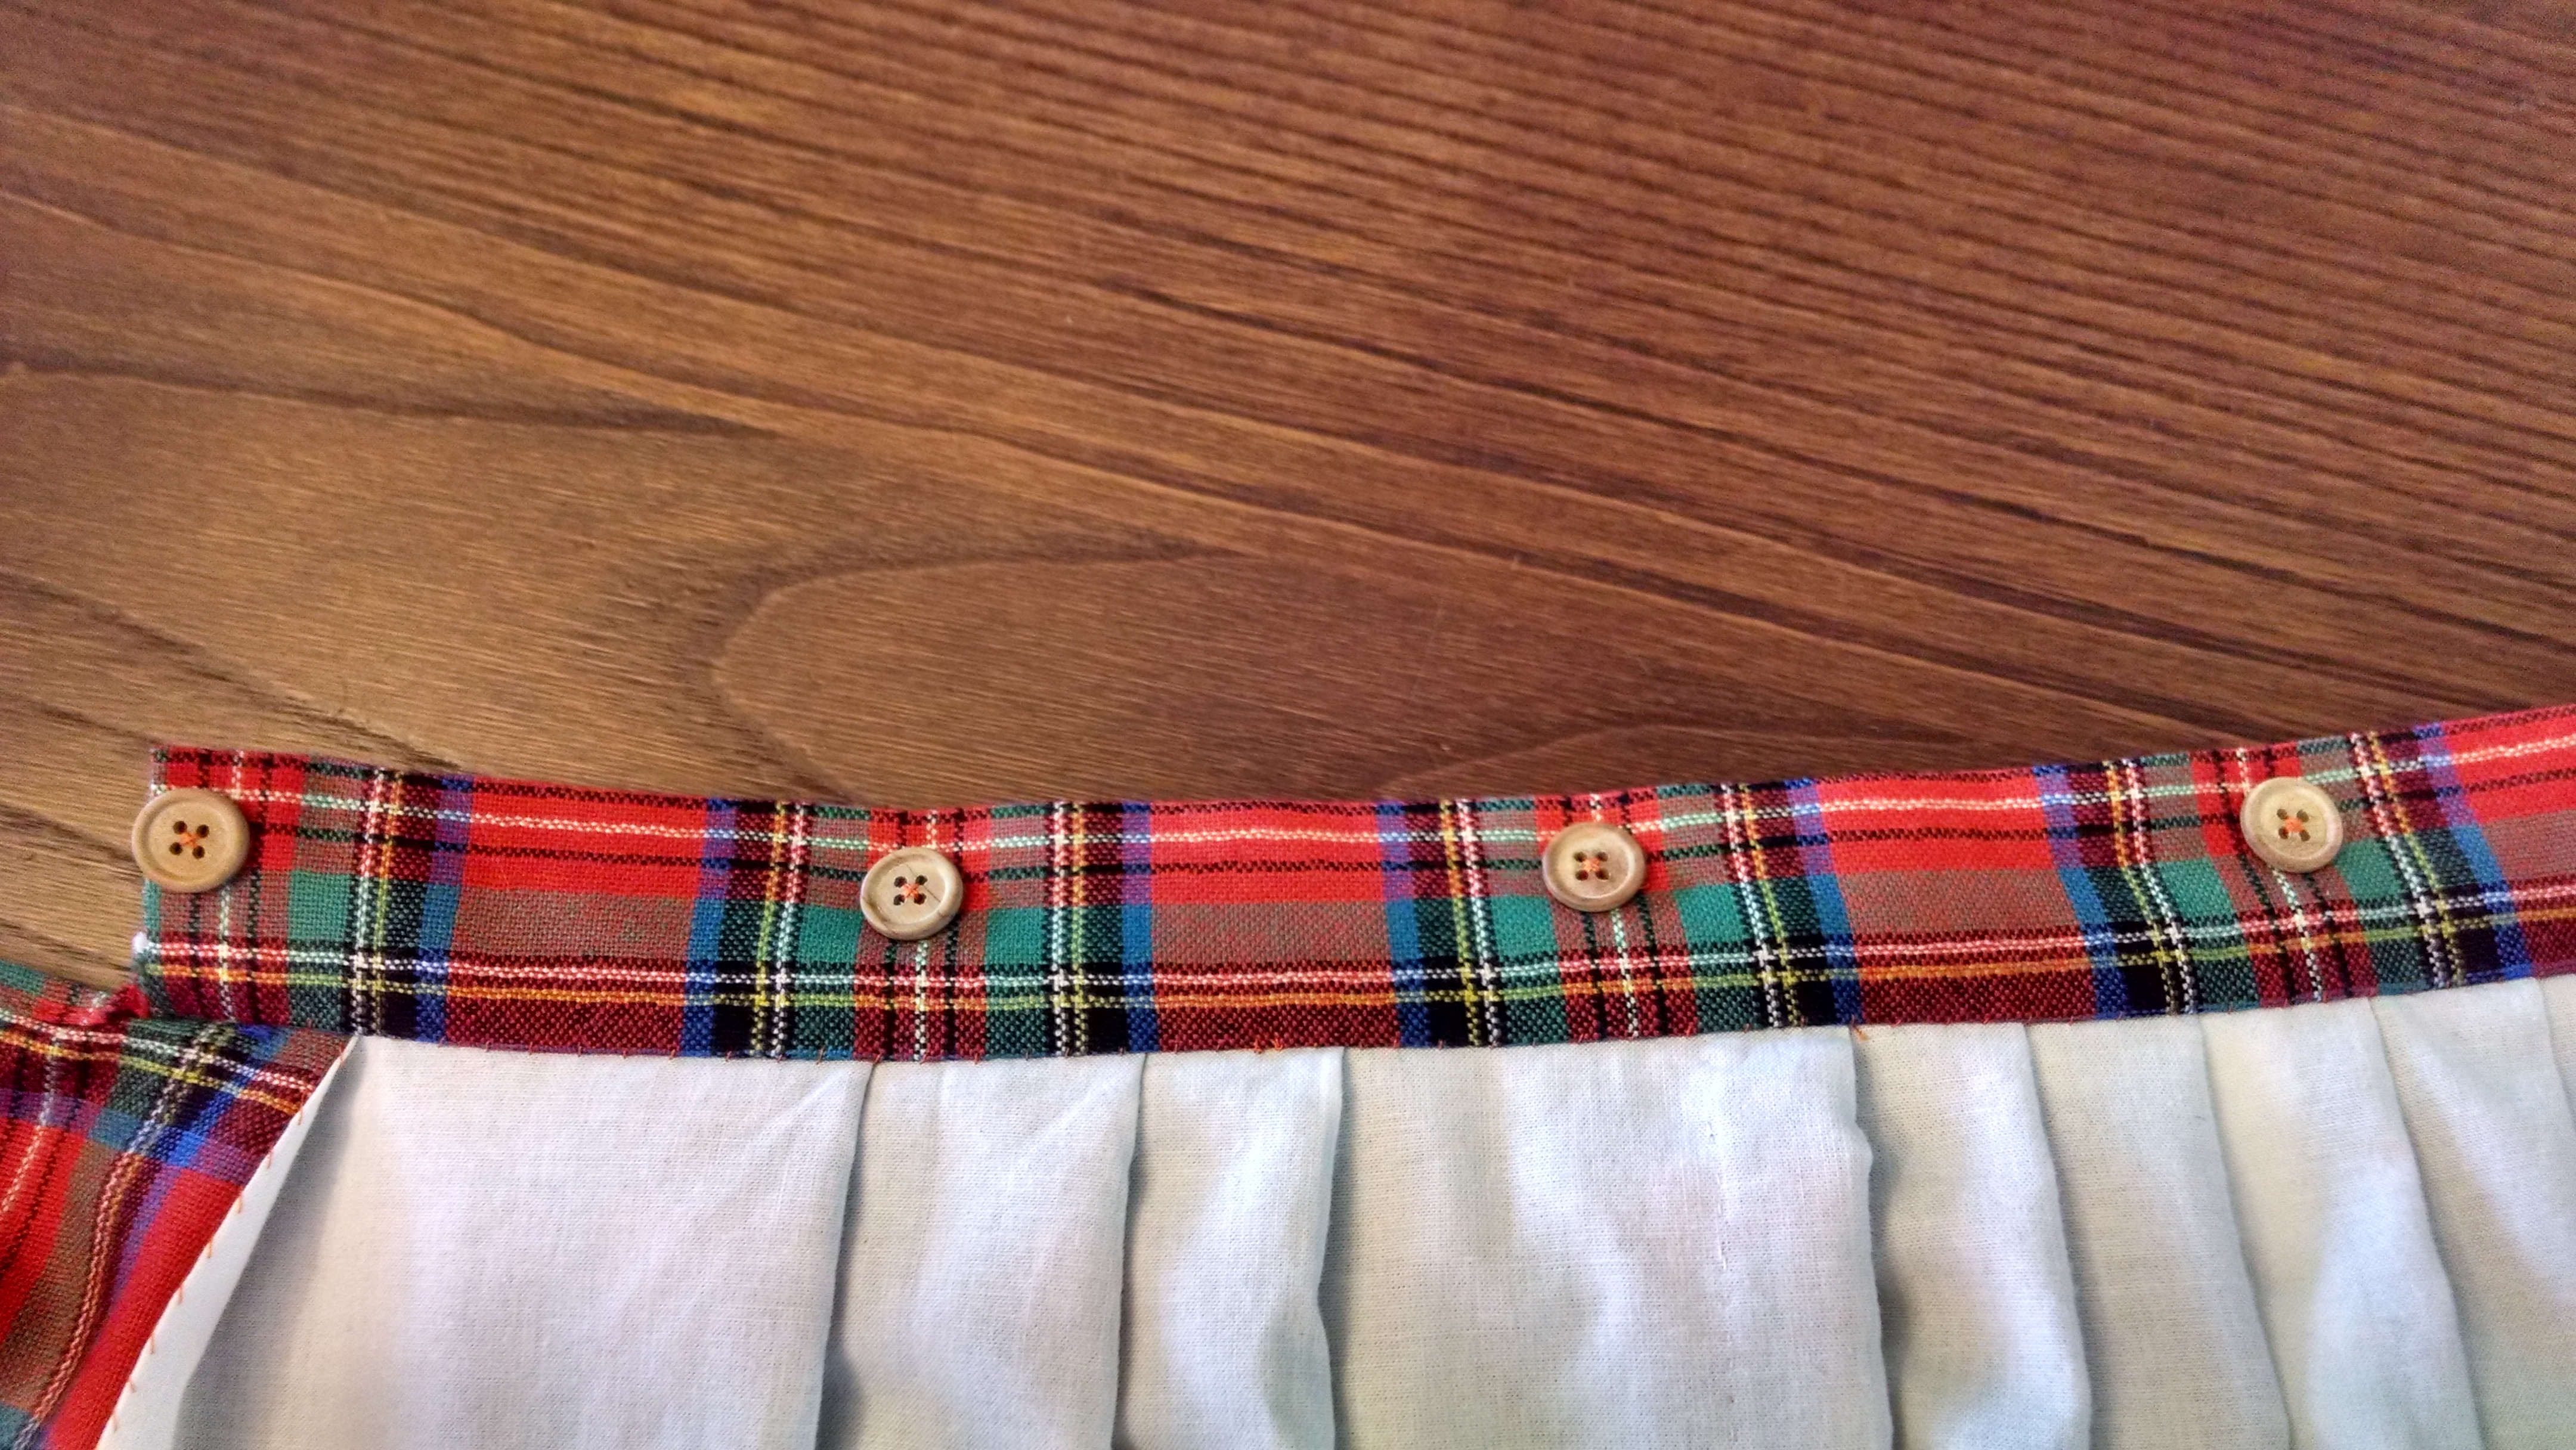
I tacked the linen ties onto the top edge of binding before folding it over to the wrong side and whip-stitching it down.

IMG_20170912_142427629.jpg
Detail of pocket binding and linen ties

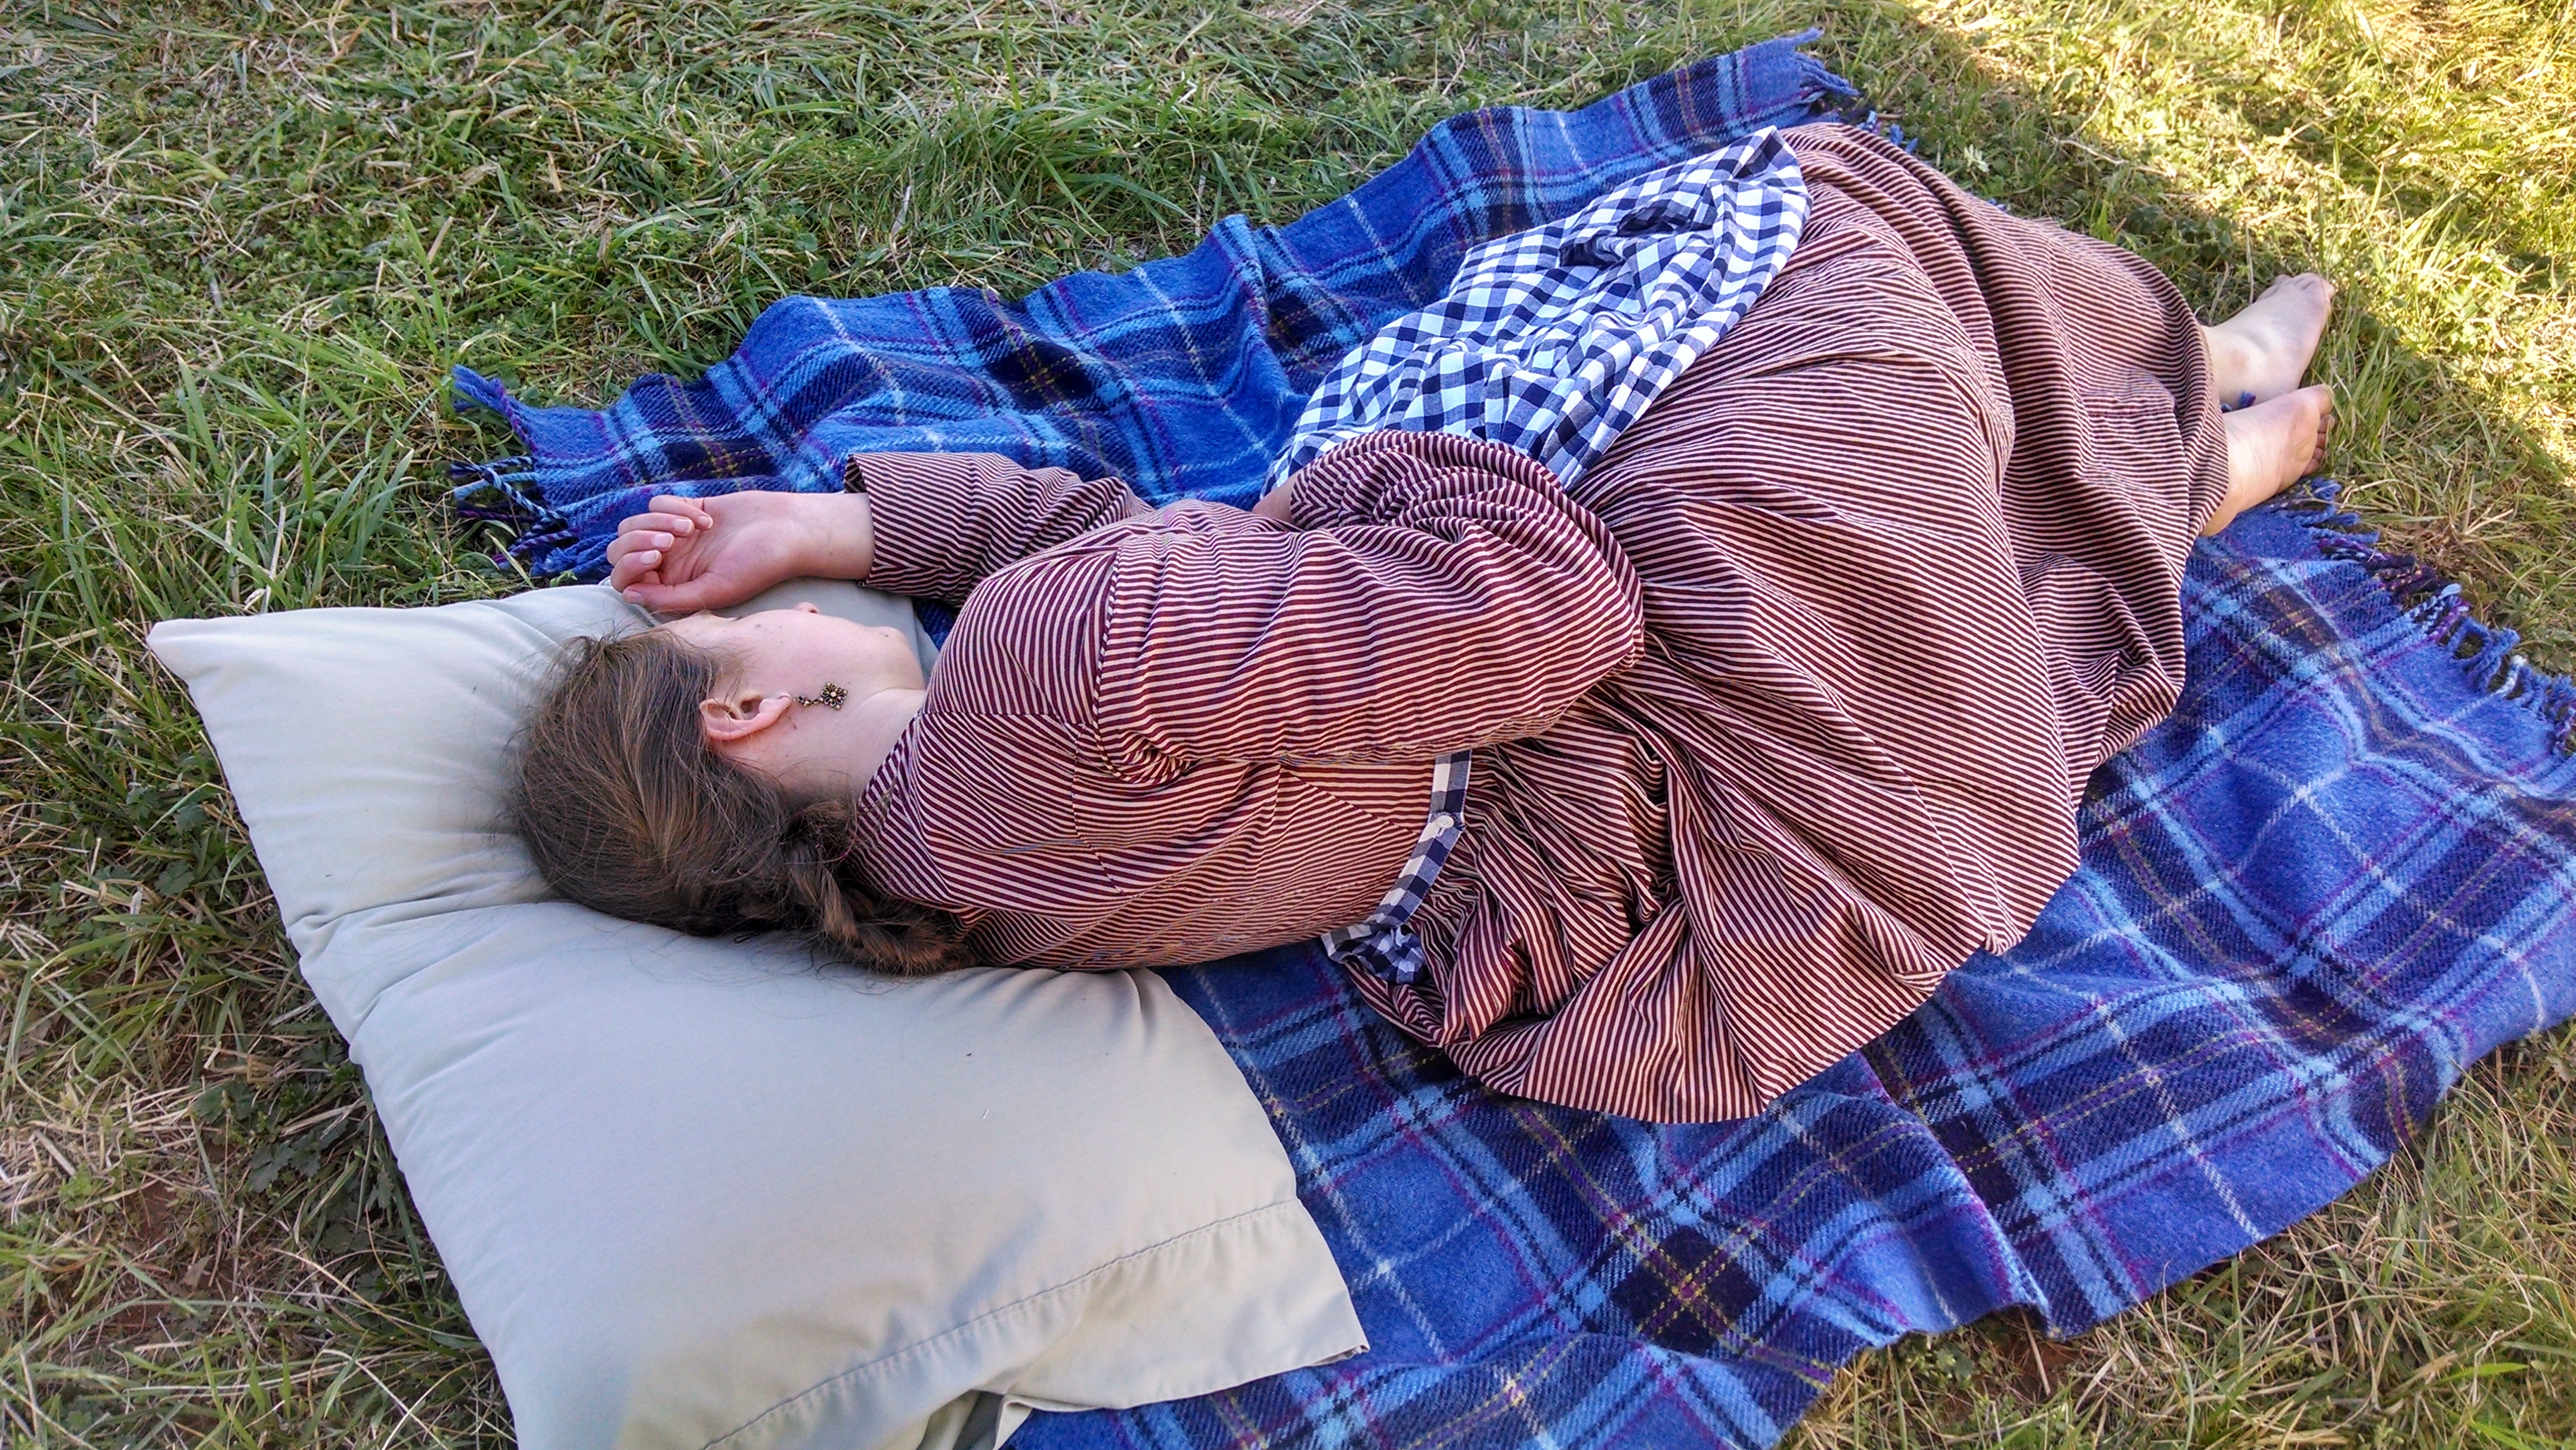
18th century pockets, just like their modern counterparts, were useful for keeping necessary items handy and personal items safely on your personage. I plan on using one pocket to hold small items I’ll need during an event as a camp follower such as a sewing kit, knife, small pair of scissors, handkerchief, food, brush, etc. The other pocket I’ll use to secret modern items like my car keys, modern cash, and contacts. I can’t wait to get the chance to use them!

-Michaela, “The Farming Daughter”

Just the basics:

Fabric: 1/4 yard blue stripe linen, 1/4 yard handkerchief white linen from Burnley and Trowbridge, 1/4 yard medium weight white linen, 1/8 yard blue plaid linen

Notions: cotton hand sewing thread (shhhhh…), colored linen thread, 1 yd. linen 1/4″ linen tape ($1)

Year: 1770s

How historically accurate is it?: There aren’t as many surviving examples of plain and simple pockets, but the materials and shape are authentic, they’re 100% hand sewn, and constructed in the same manner as a pair of pockets in Colonial Williamsburg’s collection. I should have used linen thread, but other than that I’d say it’s pretty good.

Hours to complete: 10

First worn: Just to try on when finished

Cost: Technically free (because David!), but I’d guess about $15 worth of supplies

Why Reenact British?

Why Reenact British https://thefarmingdaughter.com/2017/04/06/why-reenact-british

The uncertainty was clear in Mom’s voice. “You’re going to reenact British? Why would you want to do that?” It was a fair question. I had, after all, just announced I was going to start reenacting the Revolutionary War…on the side of the “enemy”.

I have reenacted the 19th century and the American Civil War for over five years. Most of the time I portray a Northern civilian on the side of the Union. This year I decided to branch out into reenacting the 18th century and the Revolutionary War. I am currently researching and sewing to develop a British camp follower impression, a woman who followed the army to lend support through cooking, doing laundry, sewing, and nursing. So why did I decide to portray what is usually viewed as “the bad guys”?

Besides wanting to participate with some of my friends who reenact British, there are several reasons why I chose to side with the Redcoats for my first 18th century impression.

I want to reenact British because…

1.) …someone has to portray them!

You have to admit, it would be a pretty lame reenactment if the brave Continental soldiers and American militia marched out to do battle with no one! There are two sides to every conflict and it’s necessary for reenactors to be willing to rally ’round the King’s Colours as well as the Continental banner.

2.) …I want to accurately tell their story.

It has been said, “History is written by the victors.” As Americans it’s understandable that we would like to glorify and emphasize our side of the story. However, I think the British narrative deserves to be told as well. To gain an accurate picture of the war we need to look at the events from both the American and British perspectives. I hope through my portrayal I will be able to negate some of the common misconceptions and bias surrounding the British.

3.) …I want to humanize them. 

This somewhat goes along with #2. Since the British were on the opposing side we tend to brand them as vengeful monsters. History is not as cut and dried as “good guys” and “bad guys”, however. There were men who acted honorably and those who acted deplorably on both sides. I want my persona to bring the British to life, to make their motivations, hopes, desires, and struggles relatable.

4.) …I might have been one in the 18th century.

Before the Revolutionary War, the 13 colonies belonged to Great Britain and the colonists themselves were British subjects. At the time, rebelling against England was viewed by some as a treacherous and foolish decision, essentially turning traitor on your own country. Even if you disagreed with some of England’s policies, that didn’t necessarily mean you were willing to take the radical step of revolution. With the perspective of time it’s easy to unhesitatingly claim that we would have sided with the Patriots, but that might not have been the case.

5.) …they had more camp followers.

Both the American and British armies had women camp followers, but the Crown forces tended to have a higher ratio. It is entirely appropriate to portray a follower of either army, but the description of the British with their “Herds of Women” makes it especially relevant to portray one. The double benefit is most of the clothing I will be sewing for my British impression will translate to an American impression as well.


It had been suggested to me that portraying the British will disrespect the sacrifices our founding fathers made. I believe the contrary. Accurately and knowledgeably representing the British will only further show how truly amazing the American victory was over the super power of Great Britain. I’m excited to begin this foray into a new historical portrayal!

What do you think of reenactors portraying “the other side”? If you are a reenactor, what made you choose your particular persona?

-Michaela “The Farming Daughter”

(Post image: detail of “The Relief” by William Dickinson after Henry William Bunbury, 1781)

Quilted Petticoat

Quilted Petticoat ( https://thefarmingdaughter.com/2016/08/11/quilted-petticoat/) 3

It only took me 1 1/2 years to sew and 1 1/2 years to blog about, but here is my quilted wool petticoat! In 2013 I met a lovely lady named Judy at the Genesee Country Village Civil War reenactment. During a rainstorm I ducked into George Eastman’s (the founder of Kodak) boyhood home where Judy was demonstrating hand quilting. She kindly offered me both shelter and a lesson in her craft! I had a most enjoyable time and decided to start my own quilting project after the reenactment.

I determined on making a quilted petticoat because: 1.) I already had the wool flannel fabric I needed, 2.) I always get cold at events, and 3.) A petticoat is hidden under your skirts so no one would see my beginner stitches 😀 I was inspired by the quilting design on this original silk quilted petticoat from thegracefullady.com:

(from thegracefullady.com)

(from thegracefullady.com)

I decided on 3 horizontal quilting lines at the bottom of the petticoat, a chunk of shell design, 3 more horizontal lines, then the diagonal lines. The main body on my petticoat is three layers: red wool flannel from fabricmartfabrics.com, wool batting, and a cotton sateen lining. I almost wish I had used polished cotton and silk taffeta. It would have been more expensive, but for the amount of work that went into the petticoat it would have been worth it.

I couldn’t really tell from the photos how high the diagonal quilting lines went on the original petticoat, but I had decided to make my petti with a cotton yoke (to reduce bulk) so I made the lines extend all the way up the main body. The wool batting only goes up 2/3 of the body and is a sheet of batting peeled apart to make a thinner layer (I think separated once, and then separated once again to make the batting 1/4 of its original thickness). The yoke is a straight yoke, meaning it is the same circumference as the body of the petticoat (90″).

Before I could begin quilting I partially assembled the petticoat. I sewed 1.5 panels of the 60″ wide red wool flannel together to make a tube 90″ in circumference. I then sewed the cotton sateen on the bottom edge of the petticoat, right sides together, lapping the edges and sewing the last side seam when I reached the end (just like sewing on a faced hem). I laid the red flannel on my ironing board, right side down, and spread my thin layer of batting over it. Then I smoothed up the sateen lining on the wrong side, sandwiching the batting between the two layers of fabric. Using large, sloppy stitches I basted all over the petticoat to hold the three layers in place while I quilted.

To mark the quilting design I used an air and water dissolving marking pencil. I cut the shell pattern out of a sheet of plastic quilting template and just used a ruler for the horizontal and diagonal lines. Since my pencil lines would dissolve after being exposed to the air for awhile I only marked out the section of quilting as I was working on it. I used a large embroidery hoop to hold the petticoat as I was quilting. I chose to go with a contrasting colored thread and used black hand quilting cotton thread that I lightly waxed with bee’s wax. I found a thimble most indispensable!

Since this was my first hand quilted project you can actually see the progression of how my stitches got smaller and neater as I went on.

Quilted Petticoat ( https://thefarmingdaughter.com/2016/08/11/quilted-petticoat/) 5

Quilted Petticoat ( https://thefarmingdaughter.com/2016/08/11/quilted-petticoat/) 6

After the quilting was finally done, I attached the straight yoke, hand gathered the waist, attached and hand finished the waistband, and put in a buttonhole and china button.

I might still add some wool hem tape to protect the bottom edge and also reset the waistband since I made it (as usual) too large. Overall though I’m quite pleased with the finished results! The wool does a beautiful job insulating and blocking the wind, but since it’s a natural fiber the petticoat is still comfort to wear up to the mid 60s. The three layers and the quilting give the petticoat a nice fullness and when worn under a dress your skirts have that lovely “boof” of the period. Thank you again to Judy for teaching me this practical and beautiful skill!

Quilted Petticoat ( https://thefarmingdaughter.com/2016/08/11/quilted-petticoat/) 7

Fabric: wool flannel, wool batting, cotton sateen, pima cotton

Notions: black cotton quilting thread, 1 china button

Pattern: drafted my own

Year: 1840s-1860s

Notions: white cotton thread, black cotton quilting thread, white china button

How historically accurate is it?: The petticoat is constructed using period techniques and the quilting design is taken from an original petticoat. It might have been a tiny bit more accurate to use polished cotton instead of cotton sateen, but I’m satisfied with the authenticity.

Hours to complete: I did the quilting over a period of 1 1/2 years so I have no idea. It’s probably in the 150-200 hour range.

Total cost: about $50

First worn: Snowshoeing in my Civil War garb, and then at the 150th Appomattox reenactment

-Michaela, “The Farming Daughter”

The “Bess” Bonnet


The Farming Daughter: The "Bess" Bonnet ( https://thefarmingdaughter.com/2016/01/13/the-bess-bonnet/)

And still of a winter’s night, they say, when the wind is in the trees,

When the moon is a ghostly galleon tossed upon cloudy seas,   

When the road is a ribbon of moonlight over the purple moor,   

A highwayman comes riding—

         Riding—riding—

A highwayman comes riding, up to the old inn-door.

Over the cobbles he clatters and clangs in the dark inn-yard.

He taps with his whip on the shutters, but all is locked and barred.   

He whistles a tune to the window, and who should be waiting there   

But the landlord’s black-eyed daughter,

         Bess, the landlord’s daughter,

Plaiting a dark red love-knot into her long black hair.

-“The Highwayman” by Alfred Noyes

The nasty weather we’re having right now has at least one benefit I suppose…inspiring me to finally blog about my new quilted winter hood!

I began this project the beginning of October. I’d actually owned the pattern unused since last year, but I pulled it out hoping to whip up a hood before the Cedar Creek reenactment. Of course that didn’t happen, but c’est le vie. (Actually it’s more my procrastinating self’s fault, when will I learn?)

I used Anna Worden Bauersmith’s Quilted Winter Hood pattern. The pattern offers a regular size and one with a deeper brim. I went with the regular size. I’ve made various winter hoods before, but I love that this particular pattern is less utilitarian in shape and is instead modeled more like the fashion bonnets of the era. The pattern was clear and easy to understand, though I would have liked a few marks or notches to help match the pieces when sewing the bavolet to the crown.

The lining is a cream colored cotton sateen and the batting is wool. For the main fabric I chose a simple and versatile black silk taffeta. I made the bow and ties also from silk taffeta I had on hand. They are just tacked on to the bonnet, so if I get tired of them they can be easily switched out for a fresh color. I discovered the poem The Highwayman by Alfred Noyes while working on this project and didn’t realize until later that I unconsciously made the bonnet from two colors specifically mentioned in the poem!

“Bess, the landlord’s daughter,

Plaiting a dark red love-knot into her long black hair.”

For that reason I’ve decided to name it my “Bess” bonnet. 🙂

Using some suggestions offered in the pattern and inspiration from Sarah Jane’s version, I came up with a quilting design that pleased me. I quilted it all by hand. At first I didn’t plan on the final row of shell pattern closest to the brim, but I’m glad I added it because I think it balances out the design nicely.

The Farming Daughter: The "Bess" Bonnet ( https://thefarmingdaughter.com/2016/01/13/the-bess-bonnet/) 2
Quilted crown design
The Farming Daughter: The "Bess" Bonnet ( https://thefarmingdaughter.com/2016/01/13/the-bess-bonnet/) 3
Koda “helping” me quilt
The Farming Daughter: The "Bess" Bonnet ( https://thefarmingdaughter.com/2016/01/13/the-bess-bonnet/) 4
Hand quilting

The crown is stiffened with wire to help it hold its shape. The pattern recommends “20 gauge millinery wire”. I honestly have no idea how big that is, so I just used some jewelry wire we had laying around and it seems to work fine.

The Farming Daughter: The "Bess" Bonnet ( https://thefarmingdaughter.com/2016/01/13/the-bess-bonnet/) 5
A look inside the hood: all of the raw seams joining the pieces together are finished with a whip stitch
The Farming Daughter: The "Bess" Bonnet ( https://thefarmingdaughter.com/2016/01/13/the-bess-bonnet/) 7
Back view

I would definitely recommend this pattern to someone looking for a more refined, fashionable winter hood. The research and clear instructions are wonderful. I was a little leery of the price…$20. I thought that was a little much for a pattern that is basically only three pieces…but then again, the price didn’t dissuade me from purchasing the pattern when I did! I think the printing costs contributed to the higher price and I see that Anna now offers the same pattern as a digital download for the very reasonable price of $7 (you can buy it here). These hoods use so little material now that I have the investment of the pattern already I can see myself making quite a few in different colors!

The Farming Daughter: The "Bess" Bonnet ( https://thefarmingdaughter.com/2016/01/13/the-bess-bonnet/) 6
The three main pieces: crown, tip, and bavolet

Overall, I’m very pleased with my finished Bess bonnet. I think proper accessories can really help to complete the believable “look” of the period…and they’re great conversation starters with the public! I also love how this piece can easily be incorporated in a wide range of personas. Of course the shape and materials are fine enough for a more well to do impression, but it requires so little fabric that an enterprising farm wife could have easily afforded the small bit of silk required to make herself a nice winter Sunday piece of headwear.

I’ll be excited for the next cold weather event so I can try out my new winter hood! Have you ever sewn a winter hood? Do you have a favorite piece of historic clothing or gear that transcends several social classes?

-Michaela “The Farming Daughter”

Just the basics:

Fabric: black silk taffeta from Originals by Kay, cream cotton sateen from Joann’s, red silk taffeta from Fabrics Universe on Etsy, wool batting

Notions: black cotton quilting thread, 2′ wire

Pattern: “Quilted Winter Hood” by Anna Worden Bauersmith (the pattern is for sale here in her shop)

Year: 1860s

How historically accurate is it?: Fairly good I’d say. The pattern is modeled after designs of original bonnets and all of the construction methods are period correct. The lining should possibly be a printed cotton or a polished cotton instead of cotton sateen. I’m quite pleased with the finished results though!

Hours to complete: 10 maybe?

First worn: Just to try on when finished

Cost: $5 (black silk taffeta), $3 (cotton sateen), $1.5 (red silk taffeta), $2( wool batting) $1 (notions-thread & wire), $20 (pattern)

Total cost (with pattern): $32.50

Total cost (without pattern): $12.50

The Bible Poem

On Thursday the 11th, as we sat talking to Mother…some one asked for Miriam. She went down, and presently I heard her thanking somebody for a letter…I ran back, and sitting at Mother’s feet, told her Miriam was coming with a letter from Lydia. “Mother! Mother!” a horrible voice cried, and before I could think who it was, Miriam rushed in, holding an open letter in her hand, and perfectly wild. “George is dead!”, she shrieked, and fell heavily to the ground.

-“A Confederate Girl’s Diary” by Sarah Morgan Dawson

The Farming Daughter: The Bible Poem (https://thefarmingdaughter.com/2015/10/26/the-bible-poem/)
Photo by Emily Ann Putzke

While now we think of handwritten letters mainly as a quaint form of correspondence, during the Civil War letters were much more important. Letters were cables of communication connecting apprehensive families at home with their men far away at war. They were lifelines of relief, reassuring anxious mothers that their boys had survived the deadly battle. And all too often letters were the messengers of death, telling the sad tale of the fallen. Imagine waiting, possibly for weeks, between letters, never knowing what those sheets of paper would contain when they arrived.

I wrote this poem to include in a Civil War letter I was writing to a friend. I was inspired by the common practice of sending the remaining possessions of the dead back to the their families. Usually a letter would be written to a family by the deceased man’s commanding officer or comrade. The letter would explain the news of his death, and often times contain some trinket from the departed. A silver watch, a last letter, a lock of golden hair, a brass coat button, all offering one last tangible link with the loved one who had died, and was probably buried hundreds of miles away.

I also wanted this poem to depict the sentiments of death and dying held by most people in the 19th century, while also reflecting my own personal faith. Somewhat unconsciously I explored and juxtaposed the widely differing effect words have. How strange that the same twenty-six characters can be arranged to plunge a heart into the depths of despair, or raise their souls in glorious hope! I hope you enjoy reading The Bible.


The Bible


With bloodless white lips and ashen pale cheek

She took the small bundle, unable to speak

As cold premonition’s sharp claws gripped her throat

She steadied herself and read the short note


The letter was writ in a thick, unknown hand

And she sank to a chair, unable to stand

For Joseph, her dearest, ‘midst the thick storm of lead

Had not conquered triumphant, but was struck down instead


She glanced at her hand and the dainty gold ring

How bitter the blow and full cruel the sting!

That cut down their hopes so recent in bloom

Now laid like her sweetheart in the black of the tomb


Intensely, but softly she wept in her grief

And the rivulet of tears found no relief

Her thin shoulders shook and she let out a moan

As she thought of her Joe dying unaided, alone


At last, sorrow spent, she shuddered a sigh

And chancing a look down something appeared in her eye

In her haste she had forgot that in the bundle was more

And when sorrow struck, it had dropped to the floor


Curious, she picked up the ponderous thing

And gently unloosed its wrap of paper and string

And lo! In her lap fell a small leather book

That she herself bought and with him Joe took


Tenderly she stroked the cover, smooth from much use

And fingered the thin pages that were starting to loose

A few of the leaves were smudged black with powder

And she thought of him reading as the cannon boomed louder


Tucked ‘tween the pages she found something there

A photograph of her image and a lock of her hair

These three treasured possessions that he carried always

On march, into battle, and in the last fray


Holding a passage was a silk ribbon of red

That she had pulled from her tresses, her heart full of dread

The marked verses were spotted with the salty tear’s stain

Mute evidence of the hope ‘midst the deep sorrow gained


And inscribed near the front in two simple lines

She read what she had written in happier times

“I commend thee to God, Joseph my love,

We shall soon meet again, or else meet above.”


These simple words, the work of her pen

Like bread on the water had come back again

For God knew the hour, the minute, the day

When her Joe would be taken and carried away


Then the promise of the Lord gave strength to her heart

And she knew those in Christ would not long be apart

For on that bright morning when the last trumpet will sound

The dead will arise, and the lost will be found.


-Michaela Richmond

October 20, 2015

Angelica Civil War Reenactment

The Farming Daughter: Angelica Civil War Reenactment New Blog Post (https://thefarmingdaughter.com/2015/09/28/angelica-civil-war-reenactment/) 1

The biggest Civil War reenactment doesn’t necessarily make the best. While I’ve enjoyed attending the large and exciting sesquicentennial events the past couple of years, this weekend reminded me just how nice the smaller, local events can be too.

Mason, Addison, and I went to the Angelica Civil War reenactment hosted by the 136th NY. The first reenactment I ever participated in was actually this same event four years ago. It was special to be able to come to this event for the fourth time and camp in the exact same spot where my reenacting adventures began! Tenting next to us were also my good friend Emily, her sister Haley, and their friend Aidan.

The Farming Daughter: Angelica Civil War Reenactment New Blog Post (https://thefarmingdaughter.com/2015/09/28/angelica-civil-war-reenactment/) 2
We were all very serious…
The Farming Daughter: Angelica Civil War Reenactment New Blog Post (https://thefarmingdaughter.com/2015/09/28/angelica-civil-war-reenactment/) 3
…but not for long!
The Farming Daughter: Angelica Civil War Reenactment New Blog Post ( https://thefarmingdaughter.com/2015/09/28/angelica-civil-war-reenactment/) 26
This was Aidan’s first reenactment! (photo by Emily)

One of the reasons I enjoyed the smaller event size was it afforded better opportunities for interacting with the spectators. On Friday we helped run one of the education stations that local school groups toured. Our station was “Children’s Games and Toys of the 19th Century”. I gave a short talk explaining some the things children during the Civil War entertained themselves with and then we had various toys, including graces, hoop and stick, Jacob’s ladder, drafts, ball and cup, etc., for the kids to play with.

The Farming Daughter: Angelica Civil War Reenactment New Blog Post (https://thefarmingdaughter.com/2015/09/28/angelica-civil-war-reenactment/) 3
Our educational station (photo by Emily)

We also ran the same station the next day for the Boy Scout troops that came. I was talking to one of the scouts later and was shocked to learn that they drive each year all the way from Massachusetts for this event!!

I brought the orphan kitten that I’m raising, Koda, to the event. She also had fun playing with the toys!

The Farming Daughter: Angelica Civil War Reenactment New Blog Post (https://thefarmingdaughter.com/2015/09/28/angelica-civil-war-reenactment/) 4
(photo by Emily)

The combination of kitten and toys at our camp attracted several children, and Haley, Mason, and Aidan had a nice time playing with them all.

The Farming Daughter: Angelica Civil War Reenactment New Blog Post ( https://thefarmingdaughter.com/2015/09/28/angelica-civil-war-reenactment/) 20
Bobby was adorable in his accurate 19th century attire
The Farming Daughter: Angelica Civil War Reenactment New Blog Post ( https://thefarmingdaughter.com/2015/09/28/angelica-civil-war-reenactment/) 21
(photo by Emily)
The Farming Daughter: Angelica Civil War Reenactment New Blog Post ( https://thefarmingdaughter.com/2015/09/28/angelica-civil-war-reenactment/) 22
(photo by Emily)

The Farming Daughter: Angelica Civil War Reenactment New Blog Post ( https://thefarmingdaughter.com/2015/09/28/angelica-civil-war-reenactment/) 23

Mason hauling wood like a true 19th century gentleman (photo by Emily)
The Farming Daughter: Angelica Civil War Reenactment New Blog Post ( https://thefarmingdaughter.com/2015/09/28/angelica-civil-war-reenactment/) 24
I had a nice time discussing the Battle of Cold Harbor with one of our guys, Mr. John
The Farming Daughter: Angelica Civil War Reenactment New Blog Post ( https://thefarmingdaughter.com/2015/09/28/angelica-civil-war-reenactment/) 25
Civil War selfie 🙂

Another opportunity I had for sharing some of my knowledge of the period was Saturday afternoon. I was working on preparing a supper of chicken pot pie and a group of spectators stopped by to watch. I was able to have a very nice conversation with them about what I was doing, how my pie differed from an actual 19th century pie (not killing the chicken myself, for one thing), and food preservation during the 19th century. I love how smaller reenactments help you to get “up close and personal” with the public.

The Farming Daughter: Angelica Civil War Reenactment New Blog Post (https://thefarmingdaughter.com/2015/09/28/angelica-civil-war-reenactment/) 8
Addie assisting with supper

The Farming Daughter: Angelica Civil War Reenactment New Blog Post (https://thefarmingdaughter.com/2015/09/28/angelica-civil-war-reenactment/) 9

The Farming Daughter: Angelica Civil War Reenactment New Blog Post (https://thefarmingdaughter.com/2015/09/28/angelica-civil-war-reenactment/) 10
Part of supper cooking

The Farming Daughter: Angelica Civil War Reenactment New Blog Post (https://thefarmingdaughter.com/2015/09/28/angelica-civil-war-reenactment/) 11

The Farming Daughter: Angelica Civil War Reenactment New Blog Post (https://thefarmingdaughter.com/2015/09/28/angelica-civil-war-reenactment/) 5
Made from scratch chicken pot pie ready to be baked in the dutch oven
The Farming Daughter: Angelica Civil War Reenactment New Blog Post (https://thefarmingdaughter.com/2015/09/28/angelica-civil-war-reenactment/) 6
Baked to perfection

The Farming Daughter: Angelica Civil War Reenactment New Blog Post (https://thefarmingdaughter.com/2015/09/28/angelica-civil-war-reenactment/) 7

Saturday evening we attended one of our favorite events, the dance! I had asked Addison to do a simpler style for my hair the previous days, but she insisted on making it fancy for the dance. She did a lovely job!

The Farming Daughter: Angelica Civil War Reenactment New Blog Post (https://thefarmingdaughter.com/2015/09/28/angelica-civil-war-reenactment/) 12

The Farming Daughter: Angelica Civil War Reenactment New Blog Post (https://thefarmingdaughter.com/2015/09/28/angelica-civil-war-reenactment/) 13

I then did Addie’s hair. She has such a large amount of hair, that any style ends up looking epic!

The Farming Daughter: Angelica Civil War Reenactment New Blog Post (https://thefarmingdaughter.com/2015/09/28/angelica-civil-war-reenactment/) 14


The Farming Daughter: Angelica Civil War Reenactment New Blog Post (https://thefarmingdaughter.com/2015/09/28/angelica-civil-war-reenactment/) 15
Sisters ready to dance their shoes off! (photo by Emily)

Every year the dance is held in the Grange building. The low levels of light, crowd of dancers, and wood floors make for the perfect 19th century atmosphere.

The Farming Daughter: Angelica Civil War Reenactment New Blog Post (https://thefarmingdaughter.com/2015/09/28/angelica-civil-war-reenactment/) 16
The dance (photo by Emily)
The Farming Daughter: Angelica Civil War Reenactment New Blog Post (https://thefarmingdaughter.com/2015/09/28/angelica-civil-war-reenactment/) 18
Cooking breakfast Sunday morning (photo by Emily)

Sunday after church I had a lovely time visiting my friends Allison and Stephen at their new sutlery (what the shops in tents at reenactments are called). Allison sold me a lovely belt buckle that perfectly suits my tastes, pretty and nice without being too flashy, and Stephen helped fulfill a dream of mine by selling me my own bound copy of Godey’s!! The book is from 1857 and contains all of the issues of Godey’s Ladies’ Book from that year. I can’t wait until I have some time to sit down and explore it thoroughly!

It was a lovely weekend, and a good reminder that smaller events can be fun too!

Many of the pictures in this post were taken by my friend Emily. Be sure to check out her blog post here about the weekend to see more of her beautiful pictures!


-Michaela “The Farming Daughter”

150th Appomattox

150th Appomattox ( https://thefarmingdaughter.com/2015/05/29/150th-appomattox/)

Before us in proud humiliation stood the embodiment of manhood: men whom neither toils and sufferings, not the fact of death, nor disaster, nor hopelessness could bend from their resolve; standing before us now, thin, worn, and famished, but erect, and with eyes looking level into ours, waking memories that bound us together as no other bond; — was not such manhood to be welcomed back into a Union so tested and assured?

“The Passing of the Armies” by Joshua Lawrence Chamberlain

Last month, Addie and I attended the 150th anniversary reenactment of the Battle of Appomattox Court House and the surrender of the Army of Northern Virginia. It was slightly bittersweet, not only for the events we were portraying, but also because this is one of the last sesquicentennial reenactments. However, we were able to meet up with some reenacting friends, participate in some special scenarios, and in general had a lovely time.

The obligatory photo of Addie’s tresses…her hair is getting so long!

150th Appomattox: Addie's Hair ( https://thefarmingdaughter.com/2015/05/18/150th-appomattox/)

When planning our meals I decided I wanted to try something new. Allison had told me about cooking “standing meat pies” at Genesee Country Village and they sounded interesting. Then I found this recipe and video from James Townsend & Sons and decided to give it a try. The crust has the same ingredients as a regular pie crust, but you boil the butter and water and knead the dough vigorously. This makes the crust strong and tough. You can eat it if you choose, but the main purpose is to have a sturdy, portable, individual sized bowl and lid.

150th Appomattox: Standing meat pies (https://thefarmingdaughter.com/2015/05/18/150th-appomattox/)

James Townsend recommends pork shoulder for the filling, but I used a cubed ham steak instead. I also opted to use unflavored gelatin, a bullion cube, and water for the lear (gravy) instead of a boiled pig’s foot.

h Appomattox: Dinner of standing meat pies (https://thefarmingdaughter.com/2015/05/18/150th-appomattox/)

I made the pork pies at home, and then we rewarmed them for dinner in the dutch oven. A rather gusty rainstorm came as we were just about to eat, so we hastened to the tent to consume our supper.

150th Appomattox: Eating Dinner (https://thefarmingdaughter.com/2015/05/18/150th-appomattox/)

This is what happens when your creative little sister is bored being stuck in the tent waiting for the rain to stop…she makes flowers out of her apron.

150th Appomattox: Boredom makes creativity (https://thefarmingdaughter.com/2015/05/18/150th-appomattox/)

Saturday evening we were privileged to participate in a scenario serving rations to the Confederate troops. When the Army of Northern Virginia surrendered the troops had not eaten for several days. General Grant agreed to supply food, and sent 25,000 rations to the starving soldiers. As far as I know, the rations were not fresh ham, soft bread, and hot coffee served by ladies at tables covered in tablecloths, but it was nice to be able to be a part of the event and celebrate the re-union of a divided nation.

150th Appomattox: Feeding the Confederates (https://thefarmingdaughter.com/2015/05/18/150th-appomattox/)

150th Appomattox: Feeding the Confederates 2 (https://thefarmingdaughter.com/2015/05/18/150th-appomattox/)
Photo by Julianne Herman

Here is a sketch by British illustrator Alfred Waud, who was actually at the surrender, of Union and Confederate soldiers sharing rations:

150th Appomattox: Sharing rations (https://thefarmingdaughter.com/2015/05/29/150th-appomattox/)
“The soldiers sharing rations” by Alfred Waud from Library of Congress

After serving rations Addie and I went to the dance. The issue with this reenactment was (like most of the big 150th events) everything was very far away. We counted our steps and it was over 1/4 mile just to walk to the bathrooms and back! There were no shuttles to get to the dance so we had to walk over a mile there and a mile back.

The next morning we had agreed to help repeat the ration scenario at the  Appomattox Court House National Historical Park. After the dance we tumbled into bed around midnight and slept until my abominable alarm jerked us out of our slumber at 4 am. We seriously considered if this was worth waking up for, but we decided it was a once in a lifetime event and hurriedly dressed. It took us exactly 1 hour, which for 2 girls to get fully dressed in 19th century garb, in a tent, in the pitch black, and do our hair was quite a speed record in my opinion!

I thought the park would just be the court house and Wilmer McLean’s house (where the surrender took place) but it’s actually a entire restored village of the town of Appomattox Court House. I highly recommend visiting if you’re ever in the area.
150th Appomattox: Breakfast Rations for the Confederates (https://thefarmingdaughter.com/2015/05/18/150th-appomattox/)

150th Appomattox: Breakfast Rations for the Confederates 2 (https://thefarmingdaughter.com/2015/05/18/150th-appomattox/)

Addie serving coffee:

150th Appomattox: Addie serving coffee (https://thefarmingdaughter.com/2015/05/18/150th-appomattox/)
Photo by Julianne Herman

When we returned to camp we ate breakfast and then Addie decided to take a nap. The guys wanted her to come watch the surrender ceremony but she decided she could “only go to some many once-in-a-lifetime events in one day”. I decided I would go though, and hiked another mile to the shuttle that would take us back to Appomattox Court House.

The guys formed up:
150th Appomattox: Our Bucktails (https://thefarmingdaughter.com/2015/05/18/150th-appomattox/)

I don’t think I can sufficiently describe what the surrender ceremony was like. Part of that is probably because I was wandering around in a sleep-deprived fog, but also because moments like that have to be experienced to be understood. I want to extend my heartfelt gratitude to all of the soldiers who participated. This scenario could have come off as contrived, affected, or hollow, but instead the level of professionalism and focus to authentically recreating the actual event made for an emotionally moving display. Especial thanks is due to the Confederate reenactors. You guys have an incredible knowledge and understanding of what the real Southern soldiers went through, and I’m sure this was difficult for some of you to perform. I saw tears in the eyes of many of both the “boys in gray” and the “boys in blue”.

The Confederates marching up through the Union lines:

150th Appomattox: Confederate surrender ceremony 1 (https://thefarmingdaughter.com/2015/05/18/150th-appomattox/)

Forming up into ranks:

150th Appomattox: Confederate surrender ceremony 2 (https://thefarmingdaughter.com/2015/05/18/150th-appomattox/)

Stack arms for the last time:

150th Appomattox: Confederate surrender ceremony 3 (https://thefarmingdaughter.com/2015/05/18/150th-appomattox/)

Marching away:

150th Appomattox: Confederate surrender ceremony 4 (https://thefarmingdaughter.com/2015/05/18/150th-appomattox/)

A few of my guys:

150th Appomattox: Our 42nd PA Bucktails (https://thefarmingdaughter.com/2015/05/18/150th-appomattox/)

Sgt. Clarence:

150th Appomattox: Sgt. Clarence (https://thefarmingdaughter.com/2015/05/18/150th-appomattox/)


And this is what happens when you dance all night, get only 4 hours of sleep, feed 500 Confederates, and walk 10 miles:

150th Appomattox: Tuckered out (https://thefarmingdaughter.com/2015/05/18/150th-appomattox/)-The Farming Daughter


(Header photo is the Wilmer McLean house from Library of Congress.) 

Now He Belongs to the Ages

Sesquicentennial of the death of Abraham Lincoln Poem


Today marks the 150th anniversary of the death of Abraham Lincoln. As a tribute I have written this poem:


Now He Belongs to the Ages


Our country rejoices in peace come at last,

Now avarice and strife are confined to the past.

The sword it is shivered and there in its stead,

The olive branch waves o’er the field of the dead.


The four years long struggle is finally done,

The dark night is finished and bright dawns the sun,

The cannons have ceased their deafening roar,

While the shriek of the fife resounds never more.


Our banner victorious, we broke tyranny’s chain,

And joined North and South together again.

Exult all ye people, from East to the West,

We have withstood the fires and passed through the test!


But what is this shadow that’s lending its pall,

And turned sweetest vict’ry to bitterest gall?

The loathsome assassin has fired a blow,

That found its dread mark and laid our Chief low.


The Jubilee is quenched on this blackest of days,

And hope fallen cold where our brave Captain lays.

The time of our triumph intended for gladness,

Is drained of its joy and instead changed to sadness.


How little we valued while he was yet ours,

And failed to acknowledge the strength of his powers.

When he was among us, his greatness too near,

Now that he’s left us the truth becomes clear.


He was man of the people and yet stood alone,

Whom many have seen, but little have known.

Open and frank, yet guarded, contained,

Laughingly cheerful mixed with sadness and pain.


He was kind and forgiving, but solid and steady,

Deliberate and patient, yet active and ready,

Humble of character and humble of birth,

That belied his significance and obscured his worth.


Oh anomaly of men! Our comprehension failed,

Until his spirit had already passed through the veil.

Now he is counted among the rulers and sages,

He is no longer ours, now he belongs to the ages.


-Michaela Richmond

April 15, 2015

Braveheart: Part II

Sewing a Braveheart Kilt Part II https://thefarmingdaughter.com/2015/03/02/braveheart-part-ii/

Yesterday I posted about the tunic I sewed for a friend’s Braveheart costume. Today I’ll share about the exciting part, the kilt!

(If you didn’t see yesterday’s post you can read it here.)

First I’ll say, there has probably never been a kilt quite like this one ever sewn before. The main object was to make the kilt look like the one William Wallace wears in Braveheart. The movie kilt is a version of the Feileadh Mor, or “Great Kilt”, which is traditionally a large piece of wool, 60 inches wide and up to nine yards long. Each time the garment is worn it has to be re-pleated and then belted around the waist. My objective was to sew a faux Feileadh Mor that didn’t need to be re-pleated each time it was worn, and that only used 3 1/2 yards of 54″ wide material. The good news is, I have a hunch that the movie kilt used some cheater tricks also.

Sewing a Braveheart Kilt Part II, the inspiration (https://thefarmingdaughter.com/2015/03/02/braveheart-part-ii/)
The inspiration picture from the movie

I settled on a design featuring a wrapped, pleated skirt and then a piece of fabric extending off the end to drape over the shoulder.

The fabric that I used was a gorgeous 8 oz. Scottish wool in the authentic Ancient Royal Stewart tartan design. I chose not to prewash the fabric because I didn’t want it to lose its finish or become fuzzy.

First I measured and cut the fabric, pulling a weft thread to make sure I was cutting on grain. Then I sewed the breadths together to make a piece 24.5″ wide and 270″ long, being careful to match the design of the plaid.

Sewing a Braveheart Kilt Part II, pulling a weft thread (https://thefarmingdaughter.com/2015/03/02/braveheart-part-ii/)
Pulling a weft thread for the cutting line

The wool was rather lightweight so we decided to line it with white Kona cotton to give it some body. I used “Mrs. Pullan’s Skirt Lining Technique” taken from the 19th century book Beadle’s Dime Guide to Dressmaking. To sew the lining you lay the fashion fabric and lining fabric wrong sides together, fold back the fabric to expose the first seam allowance, and join the two pieces together by sewing through the seam allowance (you can read a better explanation of the technique here). I didn’t use this method to be “authentic” or anything, but because it provides a tidy lining, with no raw edges or stitches showing.

Sewing a Braveheart Kilt Part II, the lining (https://thefarmingdaughter.com/2015/03/02/braveheart-part-ii/)
Mrs. Pullan’s Lining Technique

60″ inches of the wool was kept unlined to use as the part of the kilt that drapes over the shoulder.

Sewing a Braveheart Kilt Part II: the lining ( https://thefarmingdaughter.com/2015/03/03/braveheart-part-ii)
The lining

To finish the edges of the unlined part I hand sewed a narrow turned hem. For the lined part of the kilt I put in a faced hem. This technique uses only a 1/2″ of the fashion fabric, while giving body and weight to the bottom edge of the garment so that it will hang nicely. The facing was sewn on with the machine and then finished by hand so the stitches wouldn’t show on the right side.

Sewing a Braveheart Kilt Part II: ( https://thefarmingdaughter.com/2015/03/03/braveheart-part-ii)
The faced hem

I knife pleated the skirt and set it to a waistband, using a slip stitch to finish it off.

Sewing a Braveheart Kilt Part II: the waistband (https://thefarmingdaughter.com/2015/03/03/braveheart-part-ii/)
The wrong side of the waistband was slip-stitched for an invisible finish

The final step was to put in four wooden buttons and hand sewn button holes.

Sewing a Braveheart Kilt Part II: buttons (https://thefarmingdaughter.com/2015/03/03/braveheart-part-ii/)

Sewing a Braveheart Kilt Part II: button holes (https://thefarmingdaughter.com/2015/03/03/braveheart-part-ii/)
Hand sewn button holes, the bane of my existence 😛
Sewing a Braveheart Kilt Part II: hand sewn button holes (https://thefarmingdaughter.com/2015/03/03/braveheart-part-ii/)
Thankfully I think they turned out neatly enough

It’s a good thing we didn’t order any less fabric, because this was all that was left:

Sewing a Braveheart Kilt Part II: remaining fabric (A Weekend of Polite Society)
Only this little scrap was left!

Some pictures of the completed kilt:

Sewing a Braveheart Kilt Part II: the completed kilt! (https://thefarmingdaughter.com/2015/03/03/braveheart-part-ii/)
The completed kilt!
Sewing a Braveheart Kilt Part II: the completed kilt (https://thefarmingdaughter.com/2015/03/03/braveheart-part-ii/)
The completed kilt showing the shoulder piece

The completed costume in use:

Sewing a Braveheart Kilt Part II: the kilt in use! (https://thefarmingdaughter.com/2015/03/03/braveheart-part-ii/)

Fabric: 8 oz. lightweight Ancient Royal Stewart Tartan wool, 100% Kona cotton

Pattern: Drafted my own

Notions: Cotton thread, 4 wooden buttons

How historically accurate is it?: Not accurate at all, but it looks like the movie kilt, so it’s perfect! 🙂

Hours to complete: Maybe 20?


-The Farming Daughter

Braveheart: Part I

braveheart 1 pinnable

Recently, I finished sewing a neat project for my friend Stewart. Stewart has Scottish ancestors and is a fan of Braveheart, so he asked me to make a kilt and tunic similar to the one William Wallace wears in the movie. It was fun sewing a “costume” that didn’t have to be 100% authentic for a change. This post will be focus on the tunic, and part two will show the kilt construction and completed outfit.

I had just enough cotton material left over from constructing the kilt that I thought I could squeeze out a tunic. It was difficult to find any clear pictures from the movie of just the tunic, so I decided to base it off of the Bocksten Tunic. This style of tunic is accurate for the 13th-14th centuries (when William Wallace was alive), and is cut to use fabric economically (which was good since I didn’t have much material).

The cotton fabric I had was white, so I used tea bags to dye it a more “natural” color. I boiled a big pot of water, and steeped about thirty of the cheapest tea bags I could find. Then I submerged the fabric in the dye and let it soak until I thought the color was dark enough. To prevent the color from being mottled I made sure to frequently stir and turn the fabric so all of the material who absorb the dye evenly. Finally, I wrung the extra tea out and dried the fabric in the dryer on high to “set” the dye.

I drafted my own pattern, using this tutorial as a guideline. I took measurements off a T-shirt to give me a general idea on sizing.  The tunic is a very simple style, with two big rectangles as the front and back.

Braveheart Tunic Front (https://thefarmingdaughter.com/2015/03/02/braveheart-part-i/)


Since I didn’t have much material I had to piece three rectangles together for the back.

Sewing a Braveheart Tunic Back View (https://thefarmingdaughter.com/2015/03/02/braveheart-part-i/)


The sleeves are elbow length and are made of tapered rectangles with square gussets.

Sewing a Braveheart Tunic Sleeve View (https://thefarmingdaughter.com/2015/03/02/braveheart-part-i/)


A triangular gore is added to each side of the tunic to add width. The gore also had to be pieced due to my small amount of fabric.

Sewing a Braveheart Kilt Side Gore (https://thefarmingdaughter.com/2015/03/02/braveheart-part-i/)


I drafted the keyhole neckline facing following the instructions from this tutorial.

Sewing a Braveheart Kilt Neckline (https://thefarmingdaughter.com/2015/03/02/braveheart-part-i/)

Since authenticity wasn’t a big issue, I used the sewing machine for all of the seams except for the slip stitch on the neckline. The bottom of the tunic and sleeve edges have a narrow turned hem. All of the seams, except where the sleeves are set in, are flat felled for durability.

The basic stats:

Fabric: White Kona cotton dyed using tea

Pattern: Drafted my own pattern using this tutorial as a guideline, and this tutorial for the neckline

Notions: Thread, tea bags to dye the fabric

How historically accurate is it?: The tunic is patterned after the Bocksten Tunic, and has a shape and design appropriate for the 13th-14th centuries (when William Wallace was alive). I used the machine to sew it though, which is not accurate in the least 🙂

Hours to complete: 6 maybe??? (not including the fabric dyeing)

Stay tuned for Part II: The Kilt! (And don’t worry, I haven’t forgotten the cow care post. I just want to get some pictures to illustrate what I’m talking about and then I’ll post, hopefully by the end of this weekend.)

-The Farming Daughter